


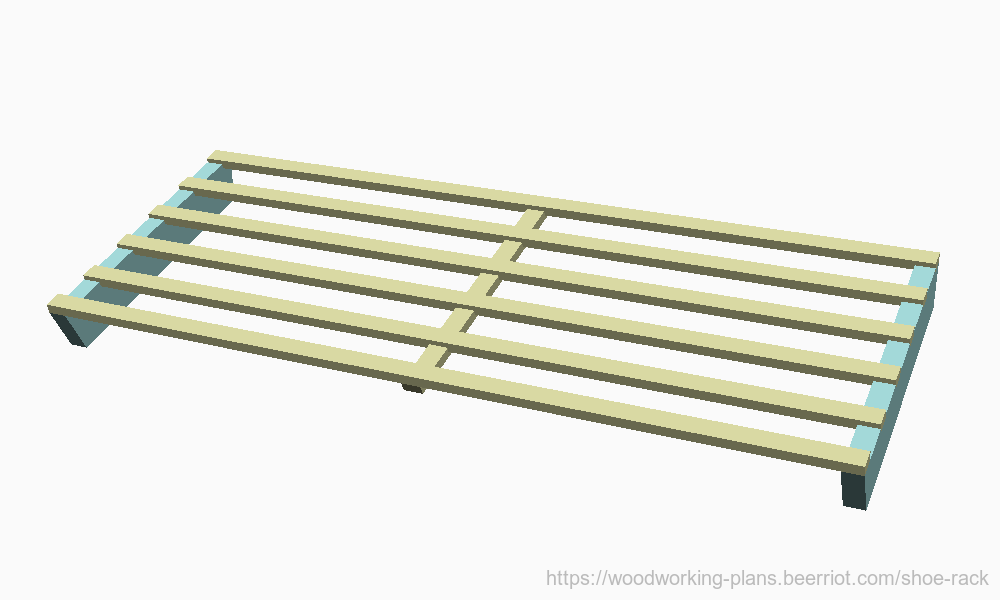
This small (84cm x 60cm x 30cm) shelving unit can conveniently organize shoes in a closet or entryway. Its light, open design allows for plenty of air cirulation. The lower shelves are tilted downward in the front, to make shoes resting on them easier to see and grab. The top shelf is flat, making it a great place to store tall boots or shoes in boxes.
As the unit is not designed to hold heavy objects, it can be assembled without fasteners. If cuts are made carefully, so that the components fit flushly, only glue is needed to hold them together. If you plan on loading the shelves with more heavy objects, consider adding screws, dowels, or other fasteners to the joints in the end pieces, as well as the points where the shelf supports are fastened to the ends.
The ribs in the centers of the shelves help keep the slats aligned in spite of seasonal wood movement. On a narrower version of this unit, the ribs may not be needed. On a wider version, consider additional ribs.
Building Instructions
Making the Ends
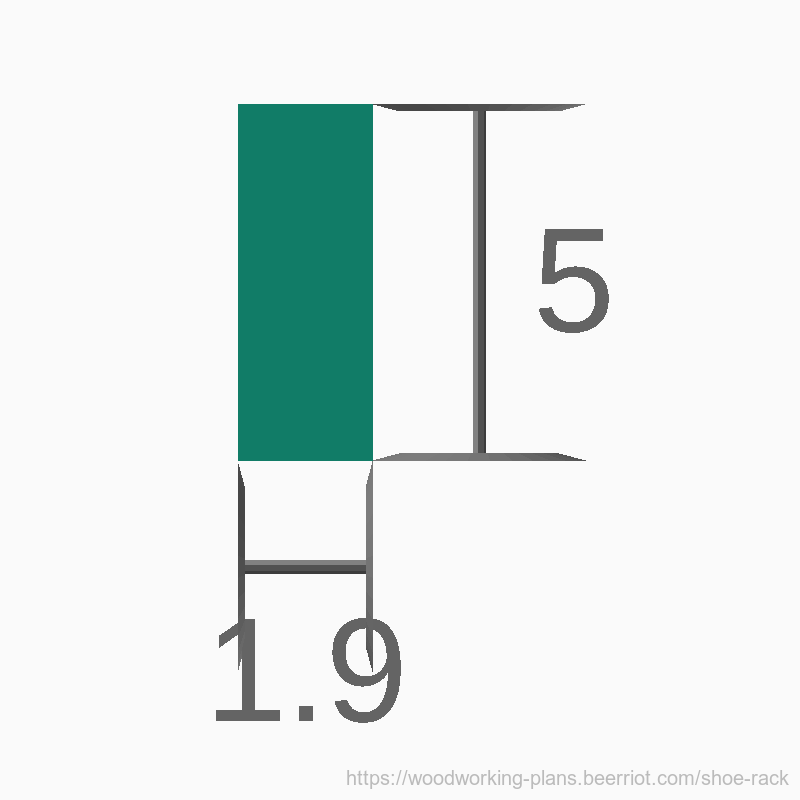
The end pieces and the shelf supports are the same width and thickness: 5cm x 1.9cm. (Figure 0) You will need about 484.23cm total stock (plus a bit extra for saw kerfs and offcuts) in this dimension.
Step 1: Cut pieces for the ends

From the stock you prepared in the last step, cut four pieces 60cm long, and four pieces 30cm long.
Step 2: Cut the lap joints.
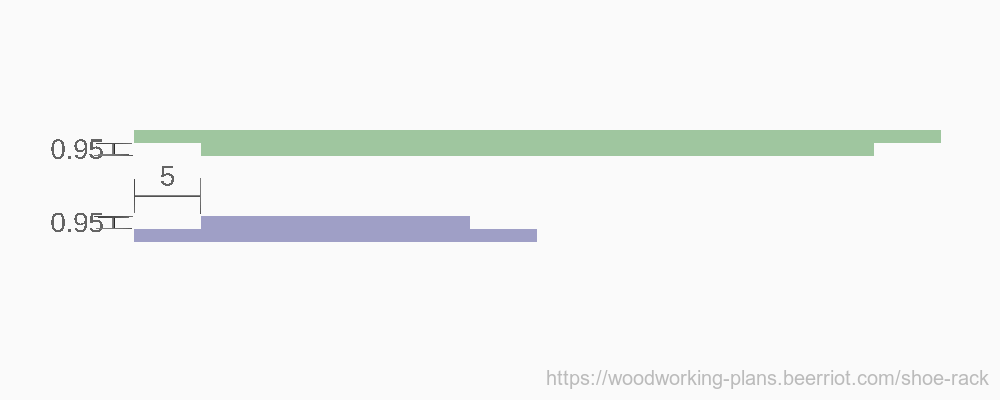
Prepare half-lap joints in the ends by removing half the thickness (0.95cm) from one face of both ends of each board, to a distance equal to the width of the board (5cm). It's best to sneak up on this cut, to get the fit as close as possible.
If you're using power tools, set up a stop block to mark the width of the cut. Make the cut in one end of two pieces, then check their fit. If either the width or the depth is too short, adjust the stop block or the depth of the cutter, then cut that same joint again. Continue this cycle until that joint is flush, cut the ends of the other boards without moving the stop block or the cutter further.
If you're using handtools, it's best to work on a single pair of ends at a time, and marks those ends to ensure that they remain paired, as each joint is likely to fit ever so slightly differently.
If you cut too far, don't fret - you have many options, without resorting to cutting new pieces from scratch. But make sure you choose the same option for all eight joints, so that the ends still come out square.
- For very small errors in either dimension, just forget about them, and sand, plane, or scrape the protruding lip off after assembly. It's common to purposely make this mistake to ensure that ends meet faces exactly.
- If the width is several millimeters or more off, you may need to consider adjusting the depth of your shelves, or their spacing. The ends will be smaller than expected.
- If the depth is far enough to cause a millimeter or more to sit proud of the joint, you can either thin the pieces before assembly (take material out of the portion of the piece between the cut areas), or fashion a shim that accounts for the loss exactly. A shim in a contrasting color might even create a fun visual accent to the unit.
- For either large error, you can also glue a bit of stock into the over-cut area to make up for the loss. To get an exact fit, you may want to glue more than was lost, and then recut through the shim.
Step 3: Glue the end assemblies.
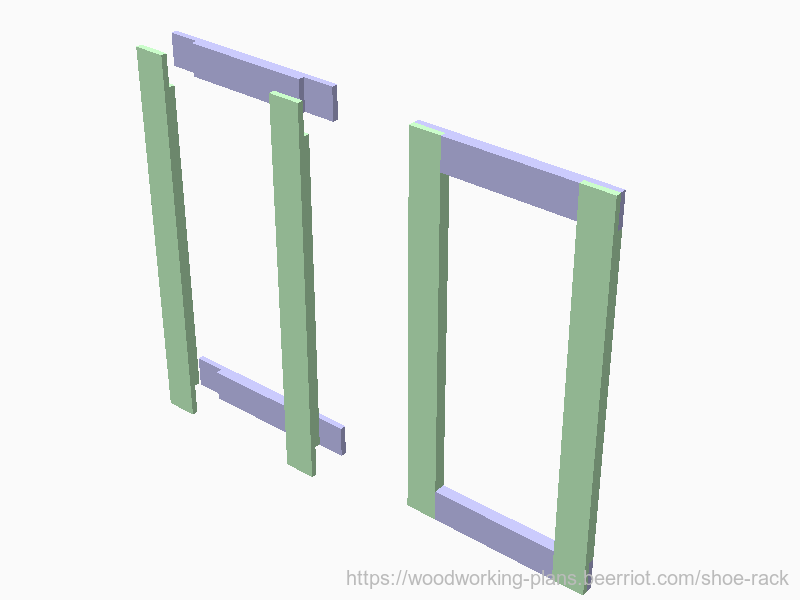
Glue and clamp the end assemblies together. One 30cm piece goes at either end of two 60cm pieces. You should end up with two separate rectangular assemblies.
To ensure that each end is square, measure diagonally from one corner, across the end to the other corner. Then measure the opposite two corners. If the measurements match, the piece is square. If they don't match, apply a little pressure to squeeze the farther corners toward each other, and then measure again.
Set the end assemblies aside to dry while working on the rest of the pieces.
Making the Shelves
Step 4: Cut the slats.
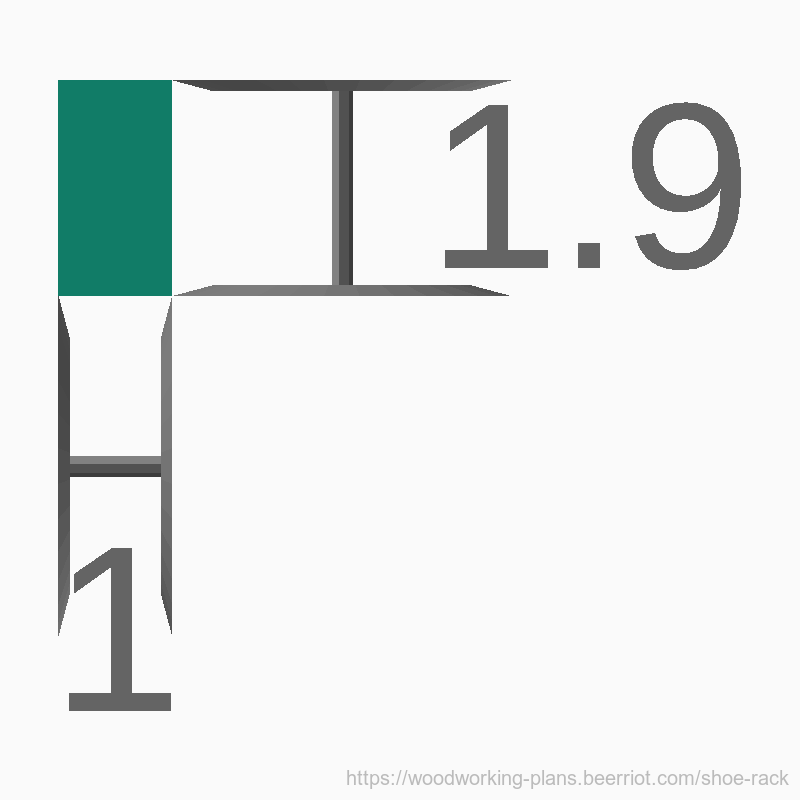
You will need 24 slats, each 80.2cm long, 1.9cm wide, and 1cm thick. A good way to make these is to find a long board that is 1.9cm thick, then set a power saw fence 1cm away from its blade, and cut several strips along the length of the board. Also cut enough extra strips to use as center supports in the next step.
Once you have enough strips, cut them into 80.2cm sections. While cutting the slats to exactly 80.2cm will ensure that the unit is exactly 84cm wide, it is far more important to make sure that the slats are all exactly the same length, regardless what that length is. If the slats are slightly different lengths, your shelves may be slightly different lengths, or the slats will stick out past their supports. If either of these happens, it will not be possible to assemble the unit.
Step 5: Shape the shelf supports.
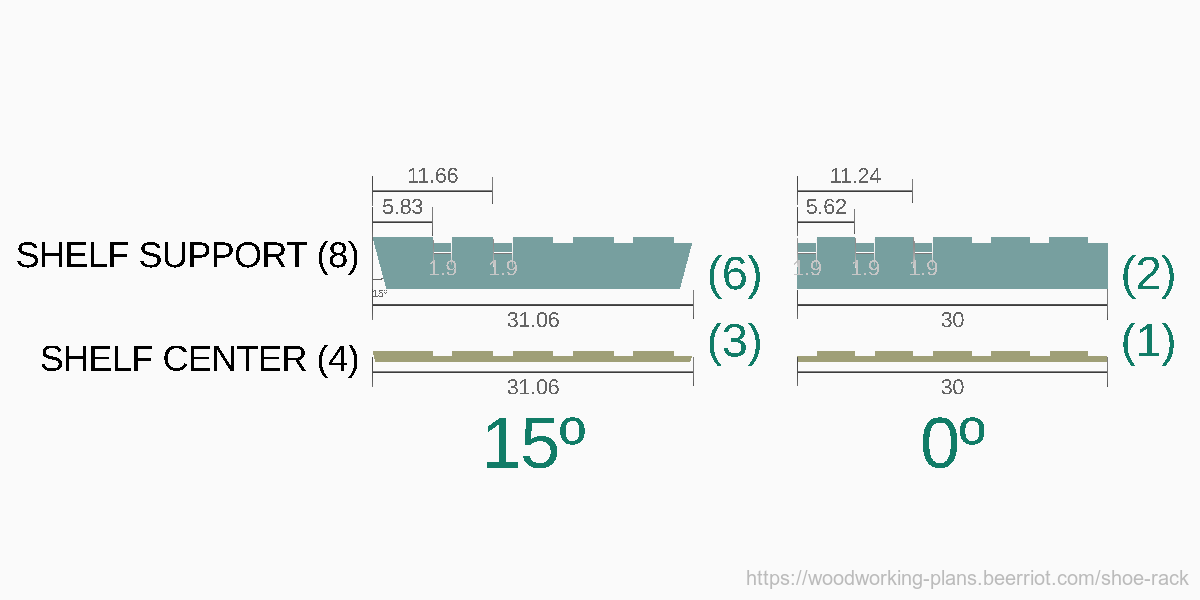
For each shelf, cut two end supports and one center support to the length given in Figure 5 (between 30cm and 31.06cm, depending on mounting angle). The end supports are made of the same stock that the ends were made of, and the center support is made from the same stock as the slats.
Next, cut rebates for the slats to fit into. The positions of the rebates are symmetrical about the center of the shelf. This means that if you're using a jig (with a table saw or router table, for example), you can cut two rebates in the correct positions by cutting one, then flipping the piece around and cutting the second. Note that for shelves that will be mounted at greater than 5, no rebate is cut for the front slat. This will leave the front slat sitting higher that the others, to provide a small lip to keep shoes from sliding off.
Finally, ease the front and back of the shelf support by cutting off the lower corner, as shown in Figure 5. This cut is most important for the back of the shelf, to keep the corner from sticking out of the rear of the unit. Matching the mounting angle makes it easy to align the shelf during assembly, but is not required. Cutting the angle on the front side gives the front of the unit a more open look.
Step 6: Cut the bottom off the bottom supports.
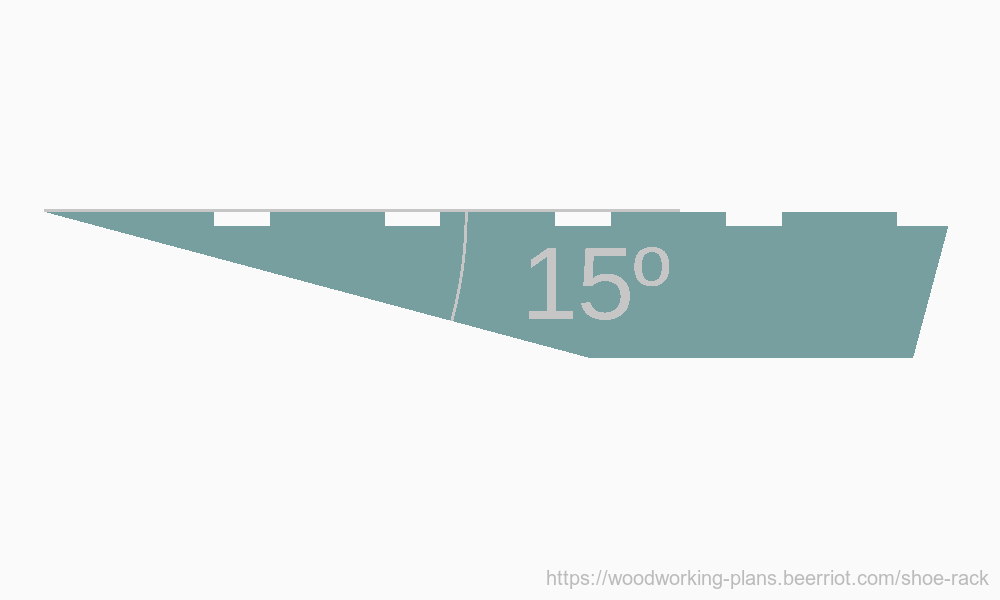
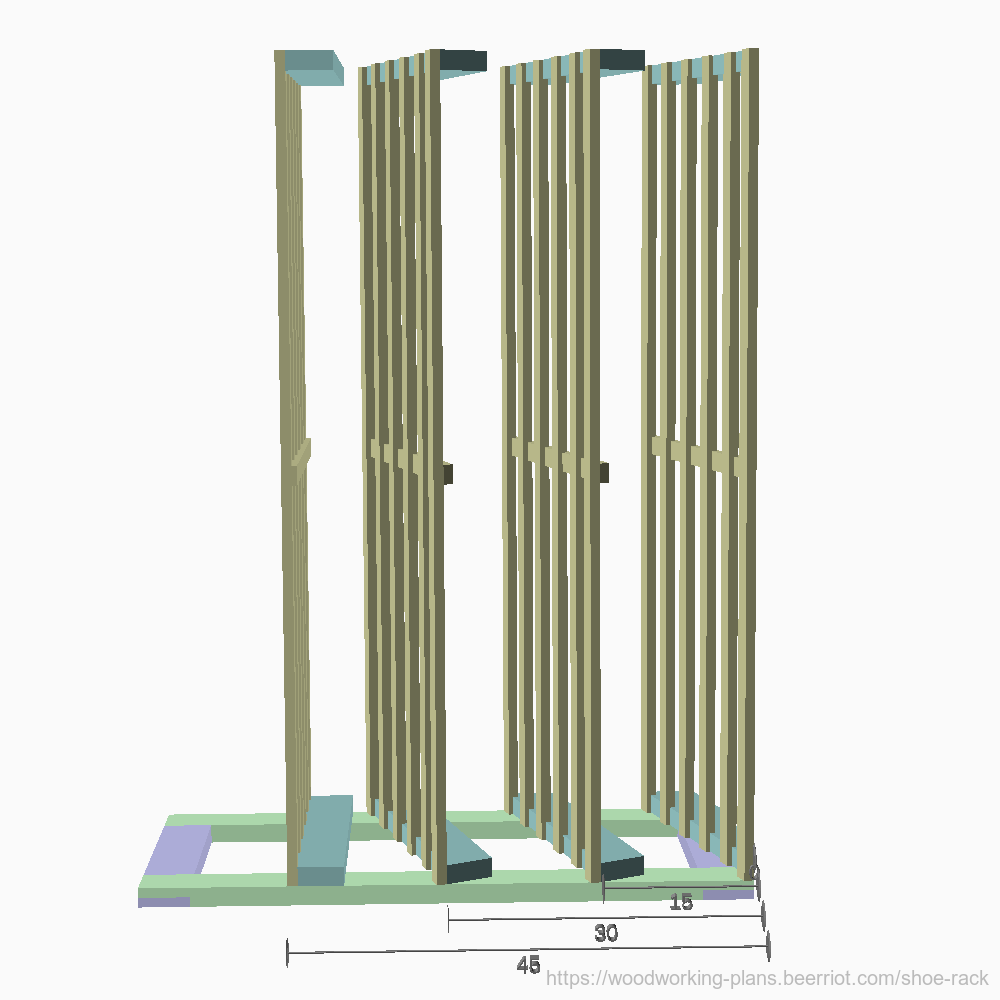
The supports for the bottom shelf need to be further trimmed so that they don't stick out from the bottom. Cut an angle 15° from the top edge of two supports, starting at the front corner.
This can be a difficult cut to make, because it's such a small angle. If you have a tapering jig - the kind that would normally be used for table legs - I'd suggest using that. Otherwise, cutting close with a handsaw or jigsaw, then flattening to the line with sandpaper or a handplane might be your best bet.
Another alternative is to delay this step until after assembly. Once the shelf is glued in position, a flush-cut saw could be used to trim the protrusion even with the endpiece it's glued to. The center support, especially, might be done more easily with a sanding block after assembly.
Step 7: Assemble the shelves.

Apply glue to the rebates in one shelf support, and then insert a shelf slat into each. Check that the end of the slat is flush with the outside edge of the support, and that the slat and the support meet at 90° Clamp the slats in place.
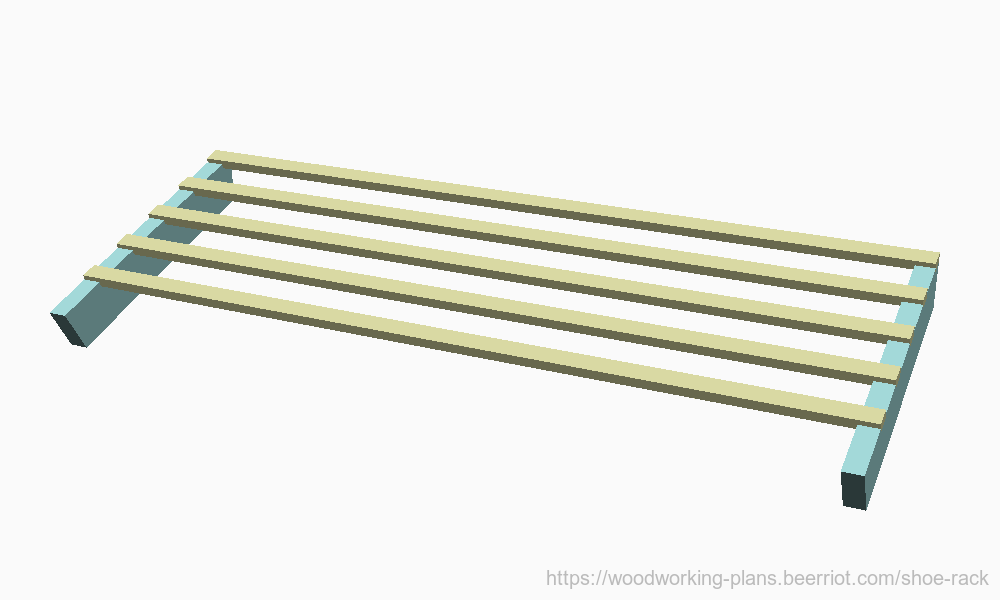
When you have enough clamps free (either immediately, or when the first side dries), apply glue to the rebates in a matching shelf support, and attach it in the same manner to the opposite end of the slats.
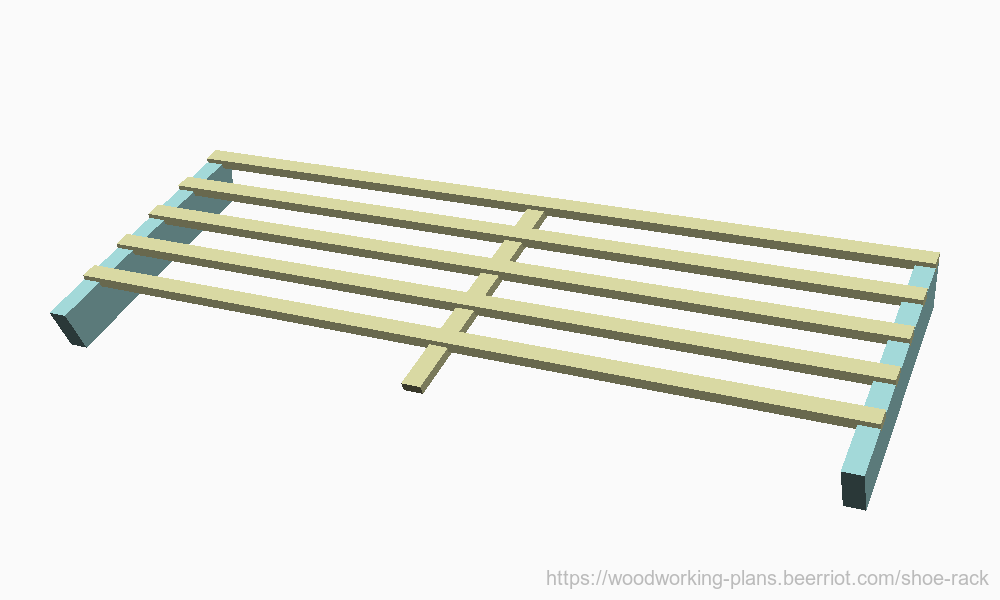
Apply glue to the rebates of the center support, and fit it onto the slats. A few light pencil marks in the middle of the slats and the middle of the center support can also help with alignment. This may be a tricky process if the slats have any curve at all, or if the rebates are not aligned exactly. A clamp with a screwed jaw can be helpful to apply pressure to seat each slat. Clamp the support in place while the glue dries.
If the front slat for this shelf does not have a rebate, attach it last. Apply glue to each of the end supports, and the center support, and then clamp the front slat to each of them, so that the front edge of the slat is flush with the front edge of the supports.
Repeat this assembly procedure for the remaining shelves.
Step 8: Attach the shelves to the ends.
When all of the glue on the ends and the shelves has dried, it's time to put them together. Unclamp everything, and clean up any glue that squeezed out of the joints. Now is also a good time to plane down the ends of any slats sticking past the sends of the shelf supports, and to plane the lap joints flush in the end assemblies.
Lay one end assembly flat. Place one shelf at a time on-end on this end assembly, and mark lightly with a pencil where the shelf sits. Also mark on the shelf support where it contacts the end assembly. Repeat this procedure using the other end assembly, but be sure to flip the shelves over!
Apply glue between your marks on one end assembly, and to that side of each shelf, then clamp each shelf in place on the end assembly. One clamp on the front, and one clamp on the back of each shelf should suffice.
Instead of laying the end assembly on my work table, I found it easier to clamp the end assembly to a narrow work stand. This allowed me to reach underneath to mark the shelf supports, and gave plenty of room for the clamps to reach.

If you have enough clamps, continue assembly immediately. If not, wait for the glue to dry before attaching the second side.
For the second side, apply glue between all marks on the second end assembly, and to all shelf ends at once, then set the assembly in place on top of the shelves still standing in the air. Clamp each shelf into place, aligning them with the marks made earlier, and leave the assembled unit to dry.
Step 9: Stain, paint, finish.
Remove the clamps when the glue has set, and stand the unit upright. Scrape off any glue that squeezed out of the joints. If the unit doesn't sit flat, sand one or both of the high corners until all four corners sit on the floor.
Assembly is complete. It's a good idea to finish the shoe rack with something that will provide it with some protection against humidity changes. Shellac, varnish, or paint are good options.
Enjoy your new shoe organization!
Copyright © 2021 Bryan Fink
 This work is licensed under a Creative Commons Attribution 4.0 International License.