


This simple tray is a great way to organize a collection of perfume sample vials. It offers a total of 86 holes in which to store perfume vials of various sizes.
Side note: The measurements given here are a little "hairy", because they are direct conversions from the Imperial units that were used to design the piece. Feel free to round to the nearest millimeter.
Building Instructions
Step 1: Cut the plank to size
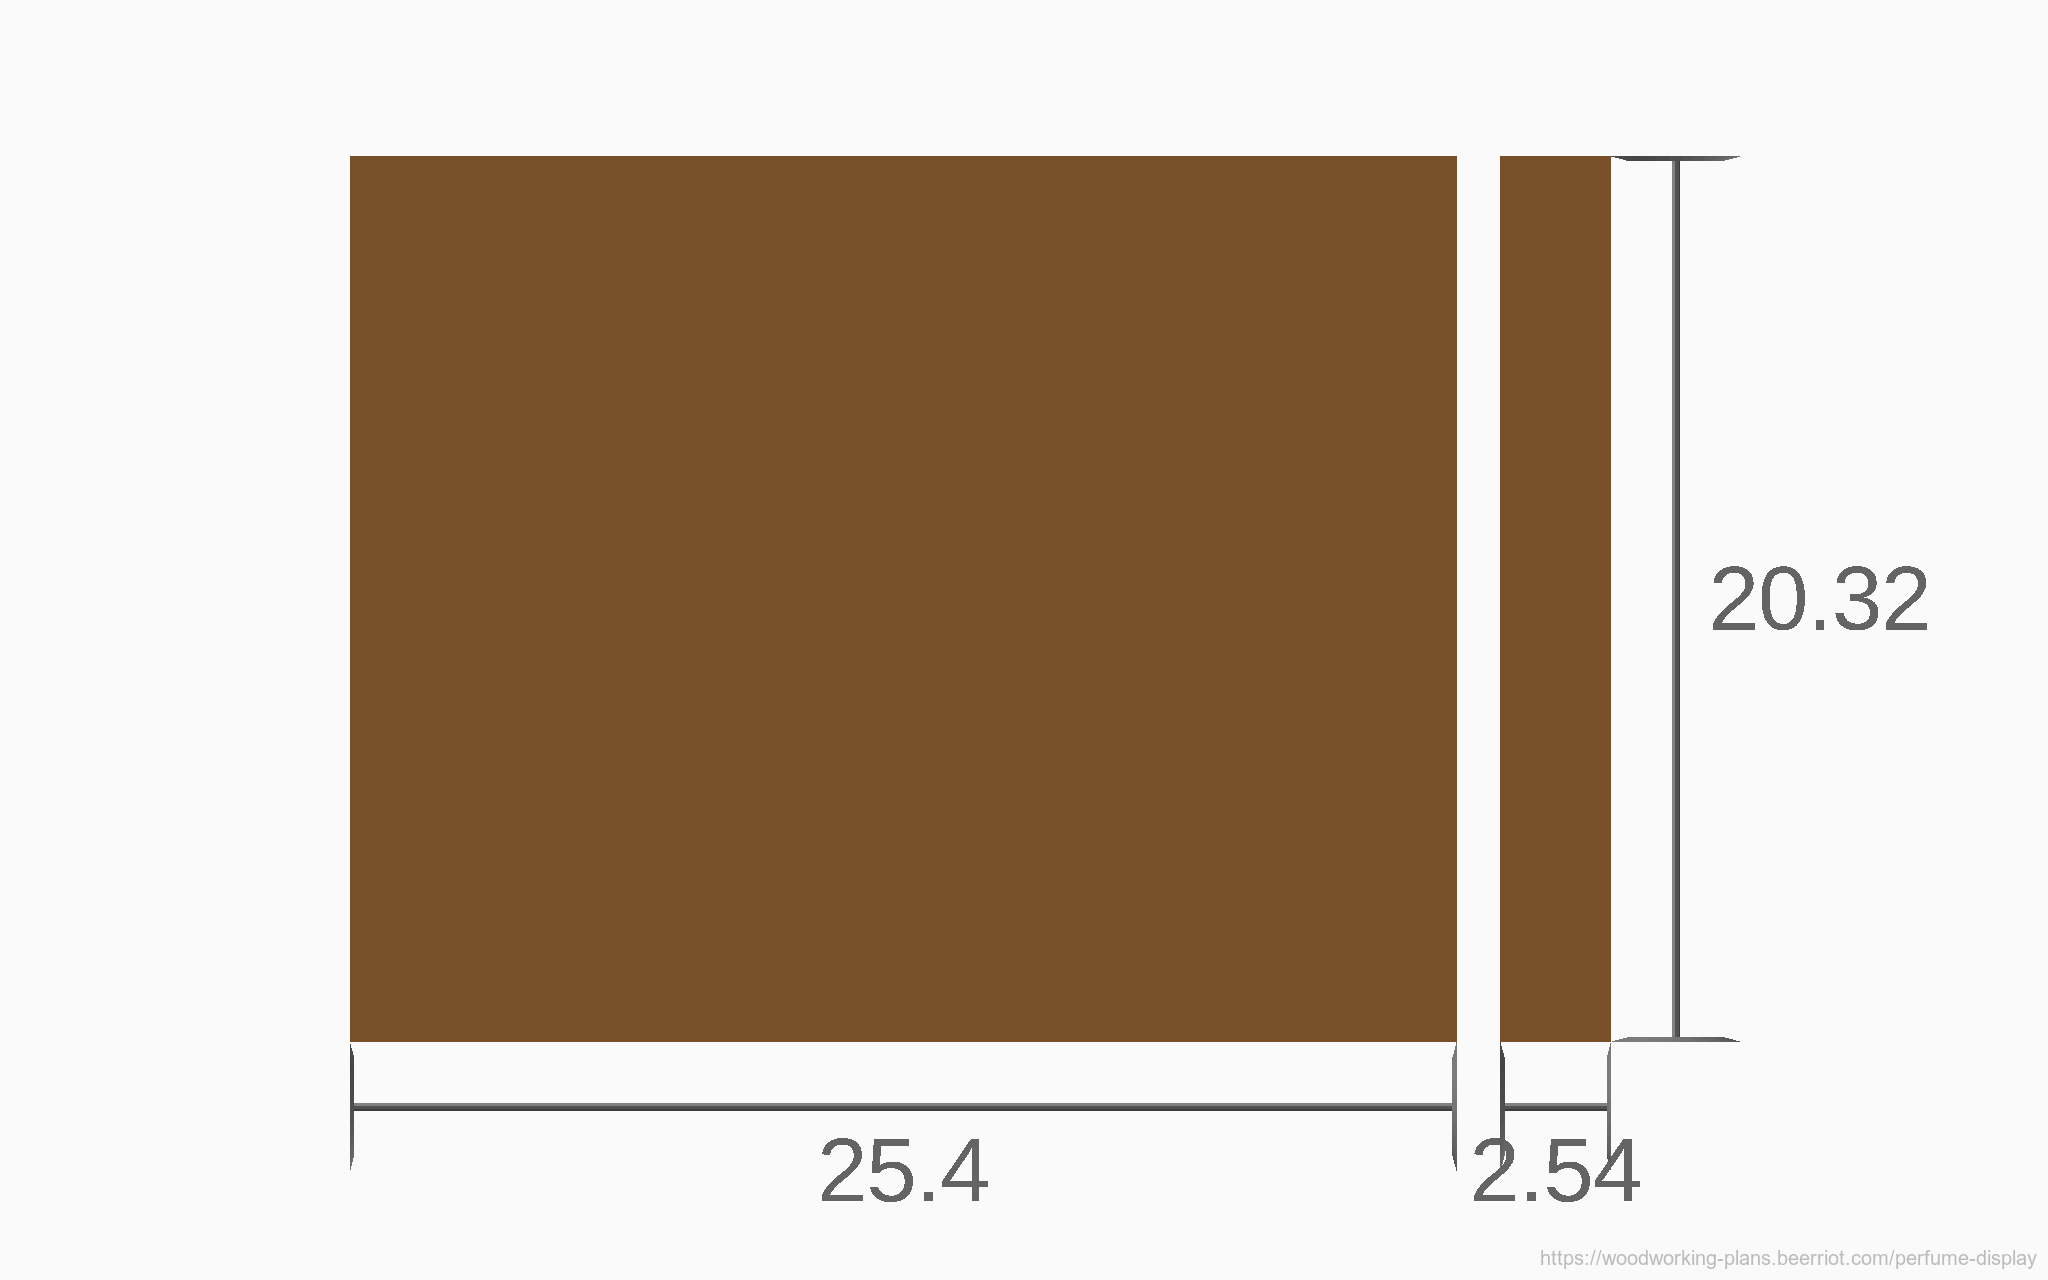
Start by milling and cutting a flat piece of wood to size.
Step 2: Layout drill positions
Next, layout the points at which to drill the holes. Here are three methods for doing this:
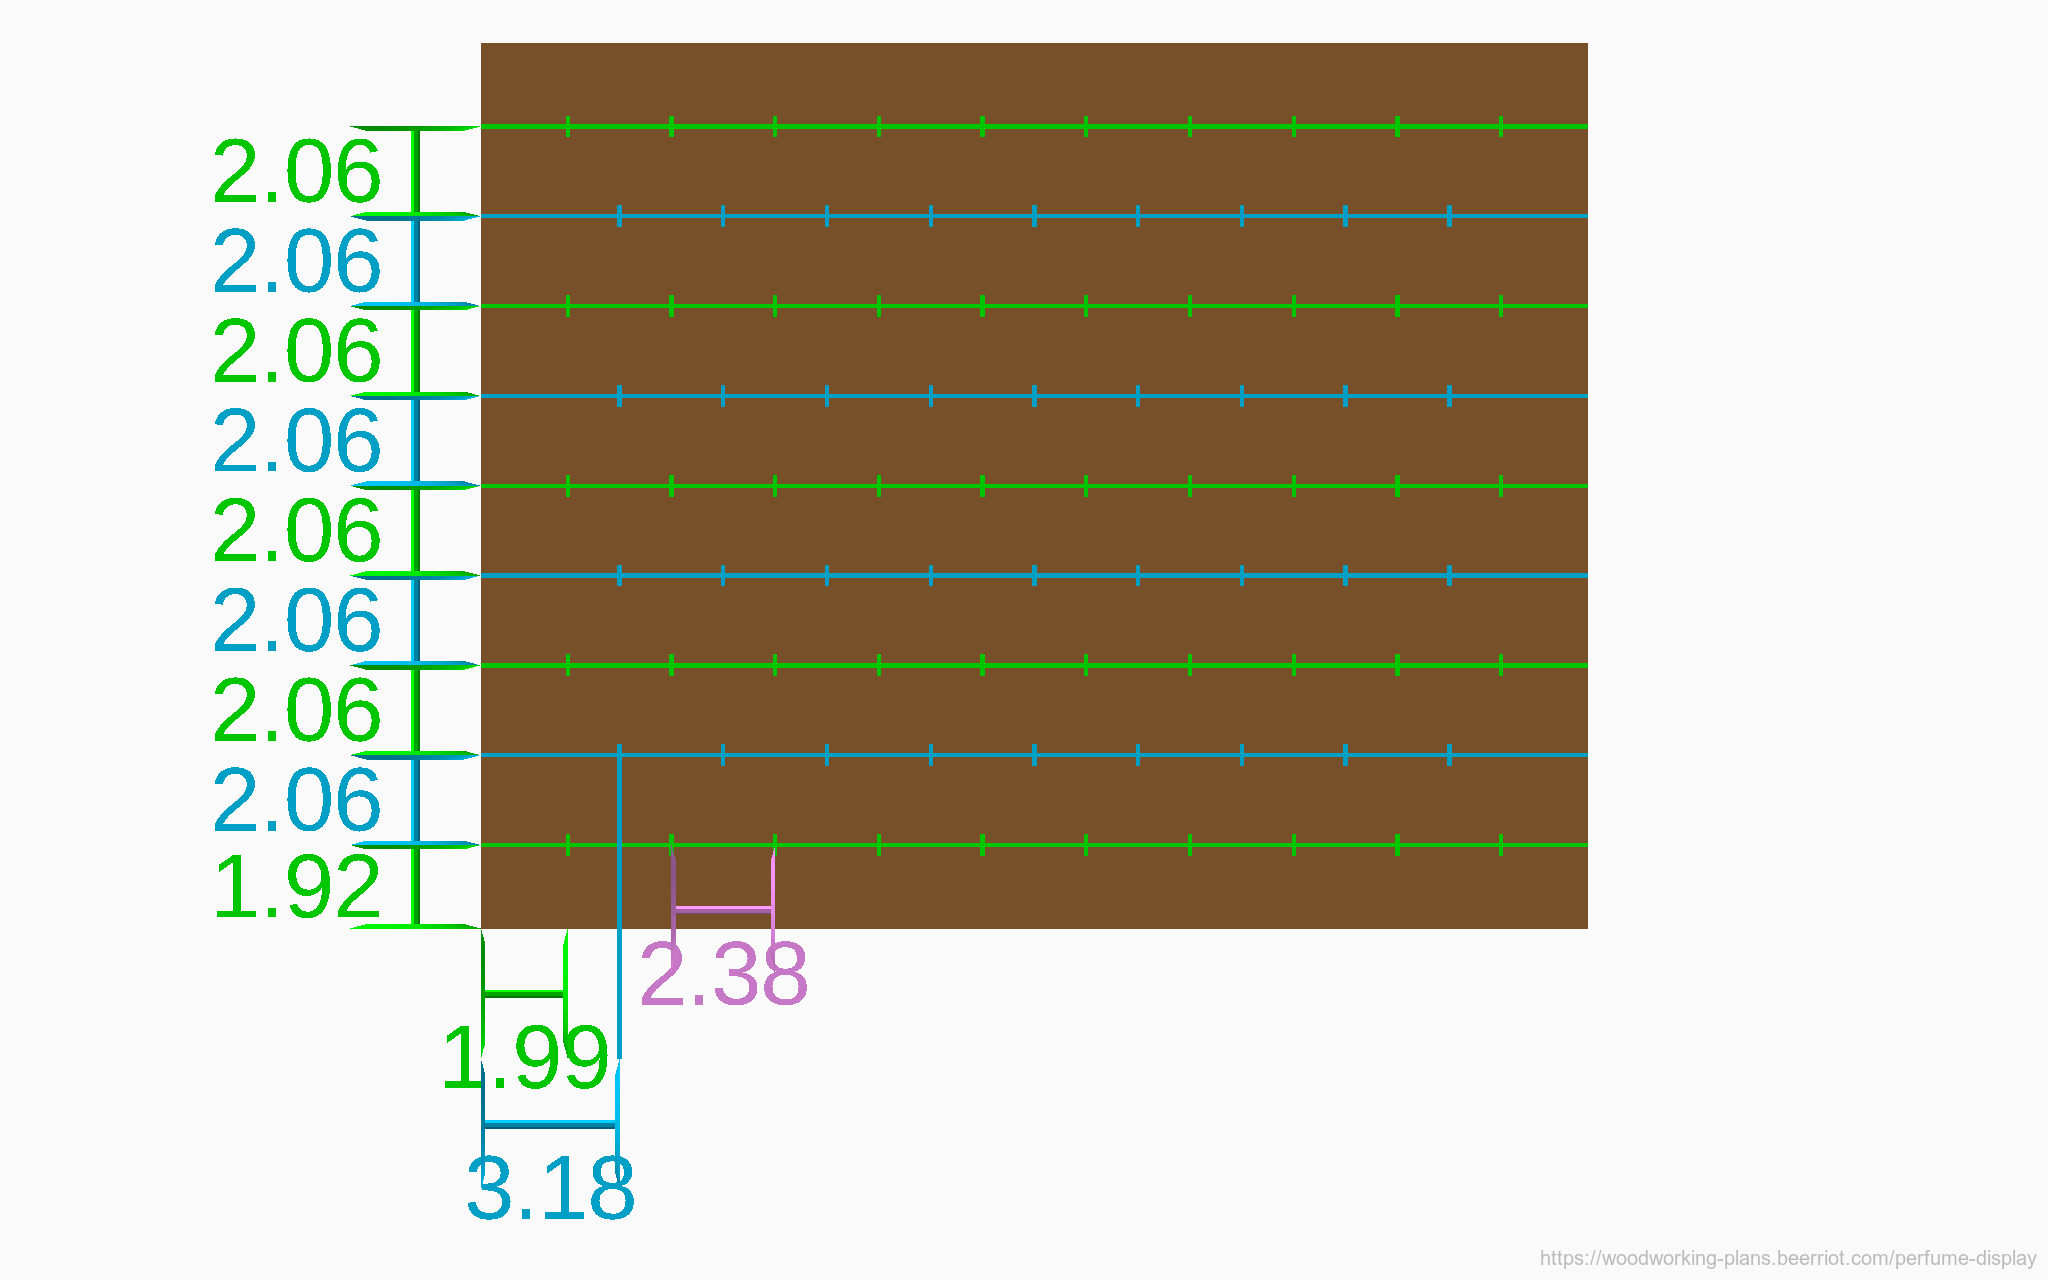
Method 1: Draw a line parallel to the front edge of the plank, 1.92cm in. Draw additional lines parallel to this one at 2.06cm intervals, until you have 9 lines. The final line should be 1.92cm from the back edge of the plank.
On the first, third, and other odd numbered rows, place the first mark at 1.99cm from the left edge. Then place additional marks every 2.38cm along the lines, until you have 10 marks on each line.
On the second, fourth, and other even numbered rows, place the first mark at 3.18cm from the left edge. Then place additional marks ever 2.38cm , until you have 9 marks on these lines.
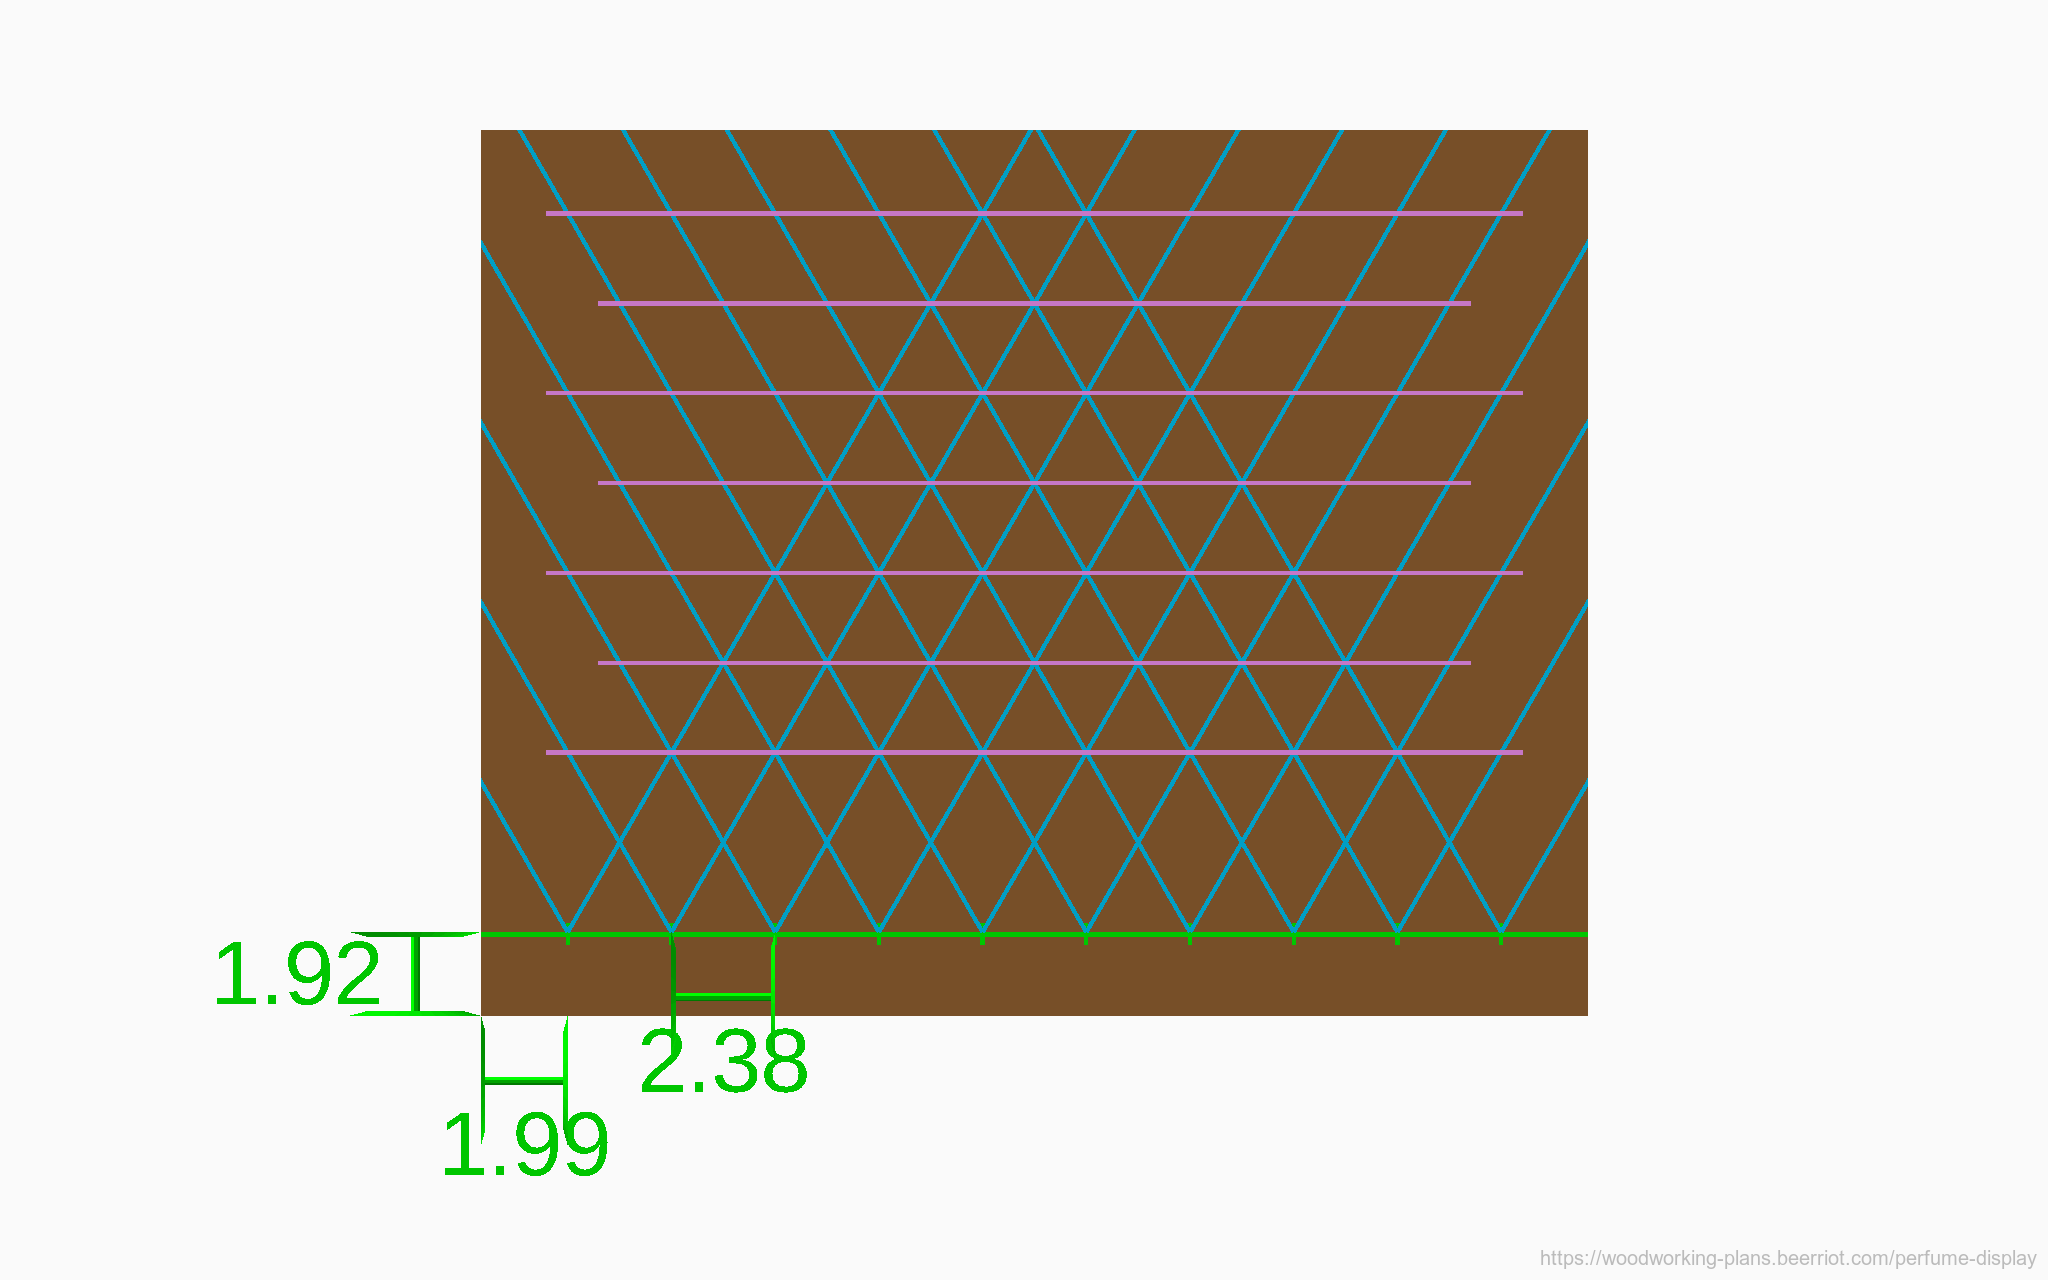
Method 2: Draw a line parallel to the front edge of the plank, 1.92cm in. Place the first mark on this line at 1.99cm from the left edge. Then place additional marks every 2.38cm along the line, until you have 10 marks.
Using a 30-60-90 triangle, or an angle copier set to 60°, mark a line starting at each mark, and rising at 60° both to the right and to the left.
The upper corners will end up with only one diagonal line, without a crossing diagonal. Measure the distance from the front edge to a diagonal cross near the middle, and then cross the outer corner diagonals at the same distance from the front edge.

Method 3: Draw a line parallel to the front edge of the plank, 1.92cm in. Place the first mark on this line at 1.99cm from the left edge.
Set a compass to mark a 2.38cm radius. Place the pivot point of the compass at the mark you made on the line, and draw as much of a circle as will fit on the board. Move the compass pivot to where the circle crossed your parallel line, and draw another circle from that point. Continue this process down the length of the line.
Now place the compass at each point where the circles cross each other, and draw another row of circles. When that row is done, repeat the process at each point where the new set of circles crossed. Continue this process until you have filled the board.
Step 3:
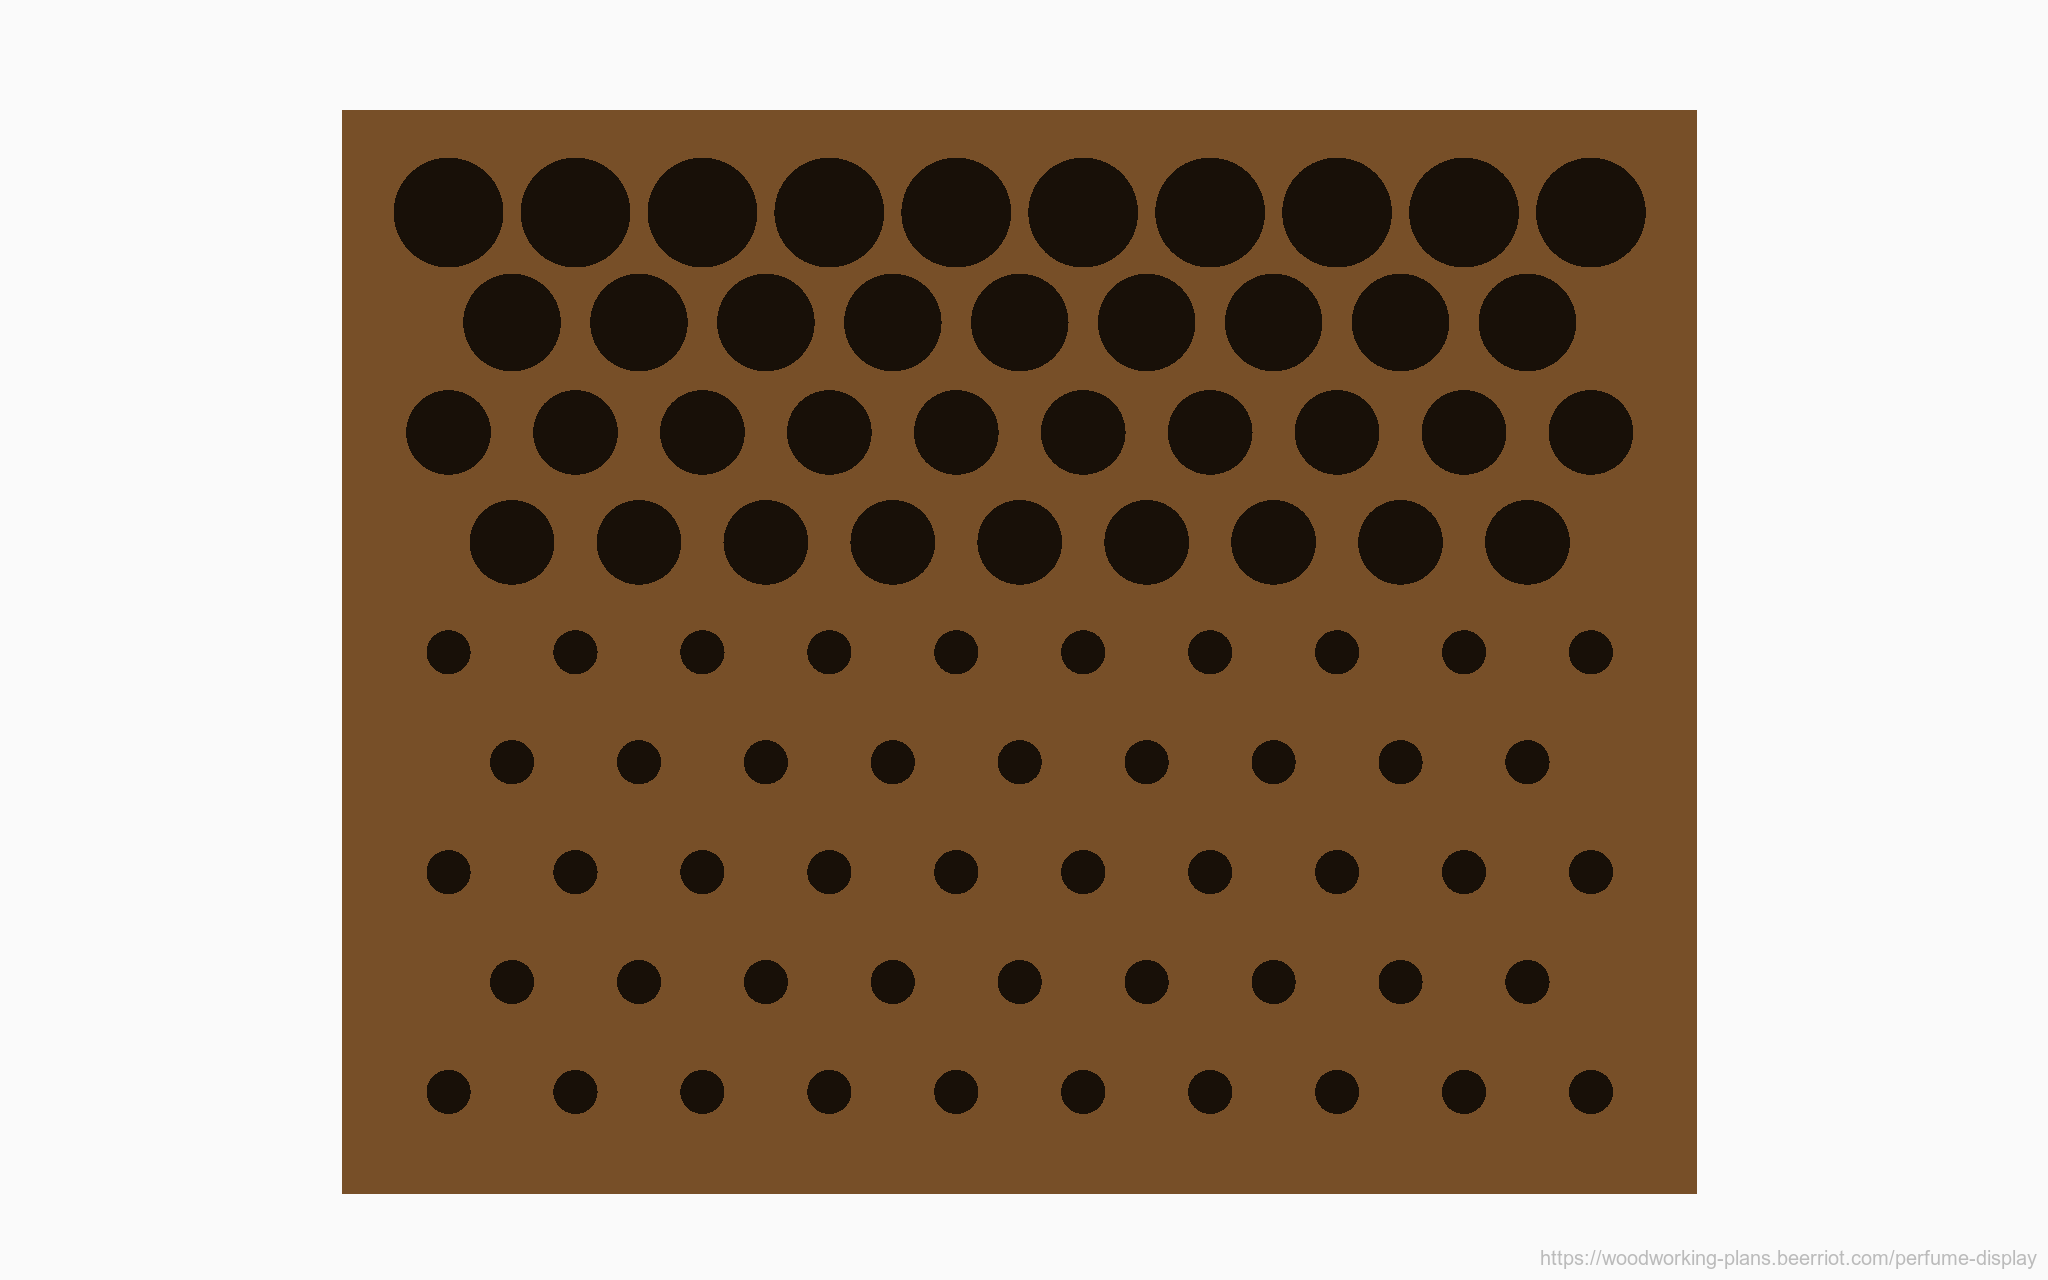
At each place to made a mark (Method 1), where the diagonal or horizontal lines crossed (Method 2), or where the circles crossed (Method 3), drill a hole to hold a perfume vial. Holes should be about one-fourth as deep as the vial that will go in it is tall. Drilling each hole just slightly larger in diameter than the vial that it will hold will make the vial easier to insert and remove. Holes up to 2.06cm in diameter can be placed next to each other while still leaving 0.32cm of wood between them.
Step 4: Chamfer and Groove

If this tray will be installed in a drawer or other box where it fits the entire space, this step can be skipped. Otherwise, adding a chamfer around the edges and a groove in each side makes the tray nicer to lift and carry, while also giving it a bit more visual interest.
A chamfer around the top and bottom edge can be done quickly with a small router and chamfering bit. Either use a bit with a follower bearing, or attach a fence to the router to keep the bit at the right horizontal distance. If a router with chamfering bit is not available, a sanding block held at an angle will also make quick work of this task.
The finger groove is most easily made with a router and a core box bit. Attach a fence to the router, and adjust it so that the center of the bit is in the center of the edge of the tray. The length and depth of the groove should be whatever feels comfortable.
Step 5: Finish
Sand, plane, or scrape off any remaining marks, and then apply finish to seal the tray. Be careful to choose a finish that doesn't dry thick and reduce the diameters of your holes! A simple oil and wax, like butcher block treatment, works great.
Copyright © 2021 Bryan Fink
 This work is licensed under a Creative Commons Attribution 4.0 International License.