


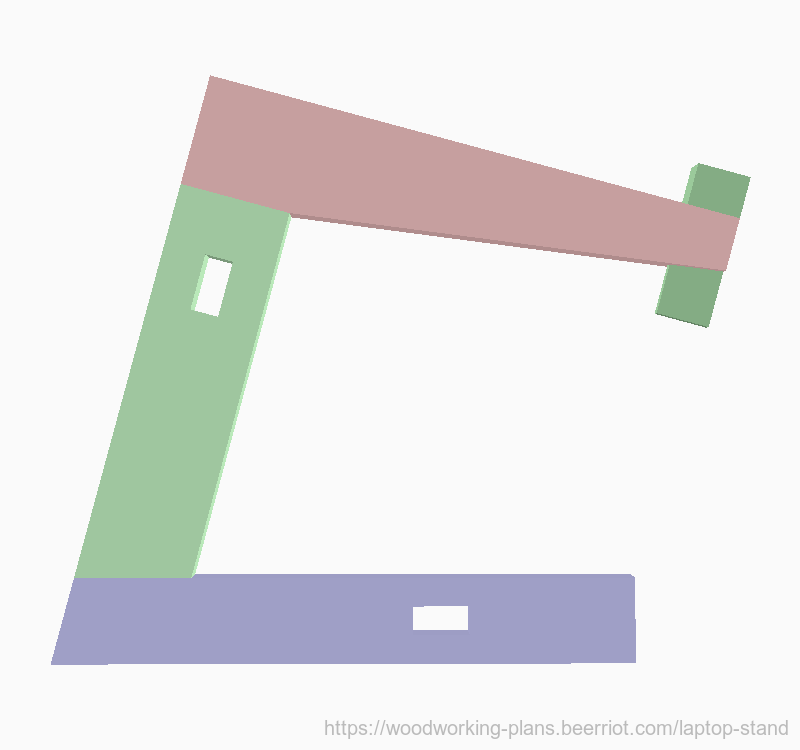
This laptop stand is designed to raise the screen of a laptop to eye-level when seated at a desk or table. The dimensions given here are for a laptop that is 31.5cm from its left edge to its right, and 22cm from front to back (for example, a 13-inch MacbookPro). The stand raises the top edge of such a laptop's screen to 46.3cm.
A few key design elements:
- The 15° forward tilt seats the laptop more securely than a level shelf would. It also allows easier access to the keyboard and trackpad than a level shelf would, for those times when external devices are disconnected.
- The feet are set back from the front edge of the arms to allow the laptop screen to be closer without interfering with the placement of an external keyboard.
- The open space between the feet and the arms is a great place to keep other accessories (external drives, for example), or to store an external keyboard temporarily.
- The open space between the arms provides a clear area for gripping the laptop when removing or installing it.
Build Instructions
This design uses mortise-and-tenon joinery for attaching the the stretchers to the feet and rear risers, and tongue-and-groove joinery for attaching the pieces of each side to each other. Exact dimensions for that joinery are only specified where it must match another component. That is, the thickness of the tenons and tongues is unspecified. It is far more important that they match the mortises and grooves than that they meet a specific number. As a general rule of thumb, cutting the tongues between 1/2 and 1/3 the thickness of the rest of the piece, leaving 1/4 to 1/3 of the material on either side in its mate, will produce a strong, good looking joint.
It is also far more important that the pairs of pieces match each other than that they match specific numbers. If the left foot is exactly the same as the right foot, the left riser is the same as the right riser, the foot stretcher is the same as the riser stretcher, etc., then the stand will fit together and stand evenly.
The parts diagram at the top of this page shows the finished components. You may wish to cut each piece slightly longer, and cut the tenons, tongues, and grooves slightly deeper. This will produce small amounts of over-extension that can be trimmed flush for a perfect match later.
These instructions will also specifically recommend starting longer stock for the feet, risers, and cleats. This allows for better jig alignment during joinery cuts, and will be trimmed after assembly.
Stock Preparation
All components in this piece are made from 1.9cm-thick material. The following lengths do not include allowance for saw kerfs.
- The arms and risers are each 5cm wide, and you'll need a combined length of 102.88cm.
- The feet and stretchers are each 3.8cm wide, and require a combined length of 50.38cm.
- The cleats are 2.42cm wide. I recommend starting with one piece that is at least 13.8cm long. Both cleats will be made from this piece, but keeping them together give much more room for secure holding while cutting the joinery.
Stretchers
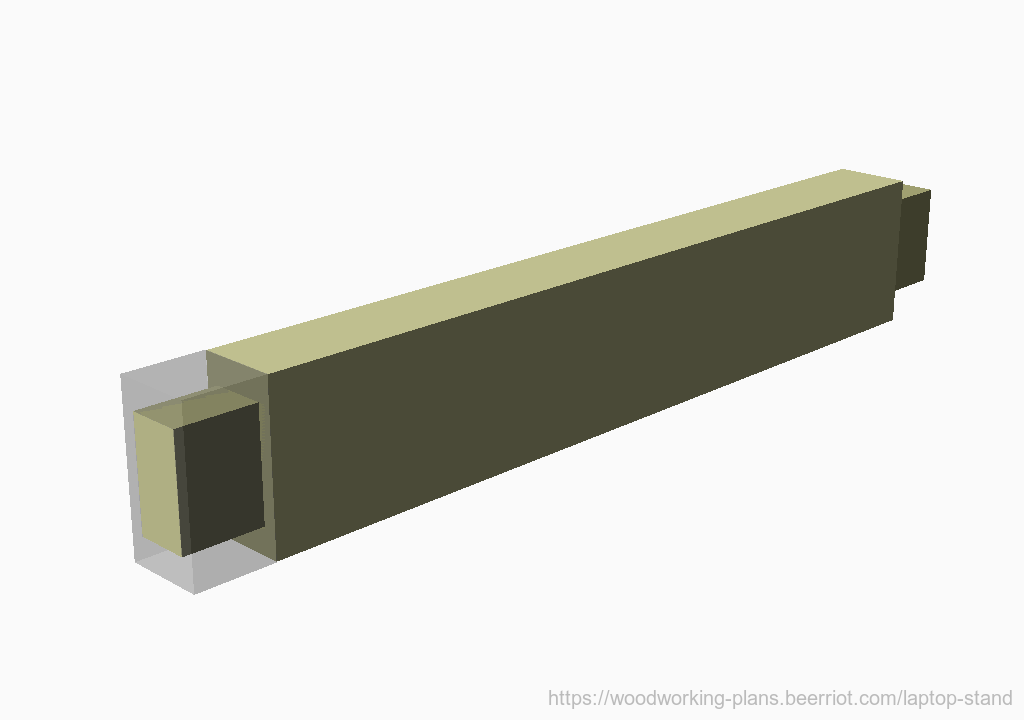
Cut the stretchers to length at 24.5cm. Then cut tenons on either end that are 1.9cm long. (Figure 1) The exact width and thickness of each tenon is up to you, but the model given here demonstrates 2.53cm by 1.27cm.
As noted earlier, it is less important that these stretchers are any particular length, than it is that they are exactly the same length. In particular, the distance from the shoulder at one end to the shoulder at the other should match, to ensure the sides of the stand are held parallel to each other.
Also note that this design is for through-tenons that are flush with the outer edge of the stand. You may want to cut the tenons just slightly longer than 1.9cm, to be able to trim the excess flush after assembly.
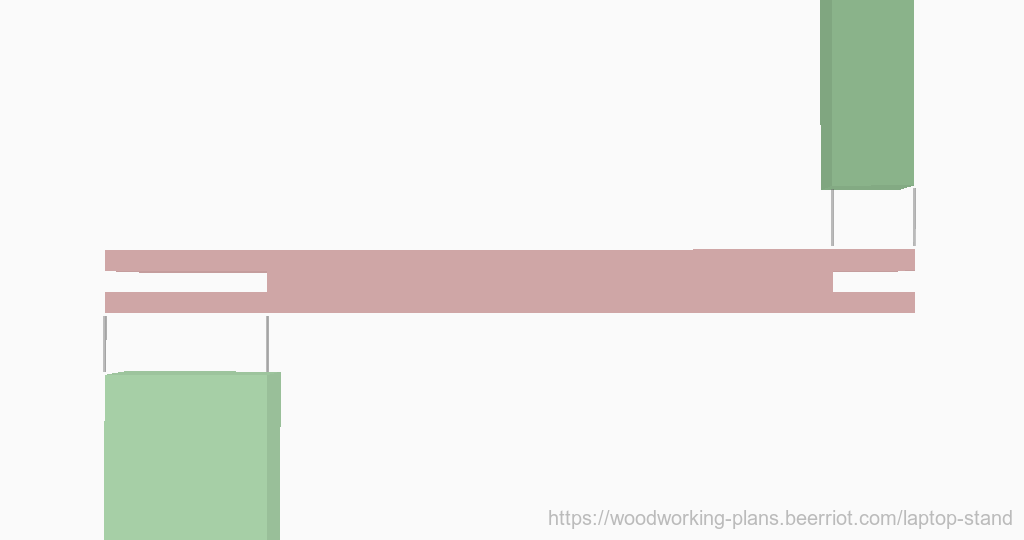
Feet

Cut the feet to length at 25.88cm (remember, this is longer than indicated by the finished parts key at the top of this page). Mark and cut a mortise in each foot matching the tenons on one stretcher. (Figure 2) The exact placement of the mortise is up to you. The diagrams here place it about 1/3 of the way from the end of each foot (forward wall at 7.36cm, rear wall at 9.89cm), and in the middle of the foot vertically (bottom wall at 1.27cm, top wall at 2.54cm).
A good way to make marks exactly matching the size of a tenon is to use the tenon itself, along with a speed square or marking gauge. First decide where you want the far wall of the mortise. Set the marking gauge to that distance, and mark the wall. Without changing the gauge's setting, place the tenon between the marking gauge and the workpiece (the foot) and make another mark. Check the marks against the tenon, but they should match exactly.
Risers

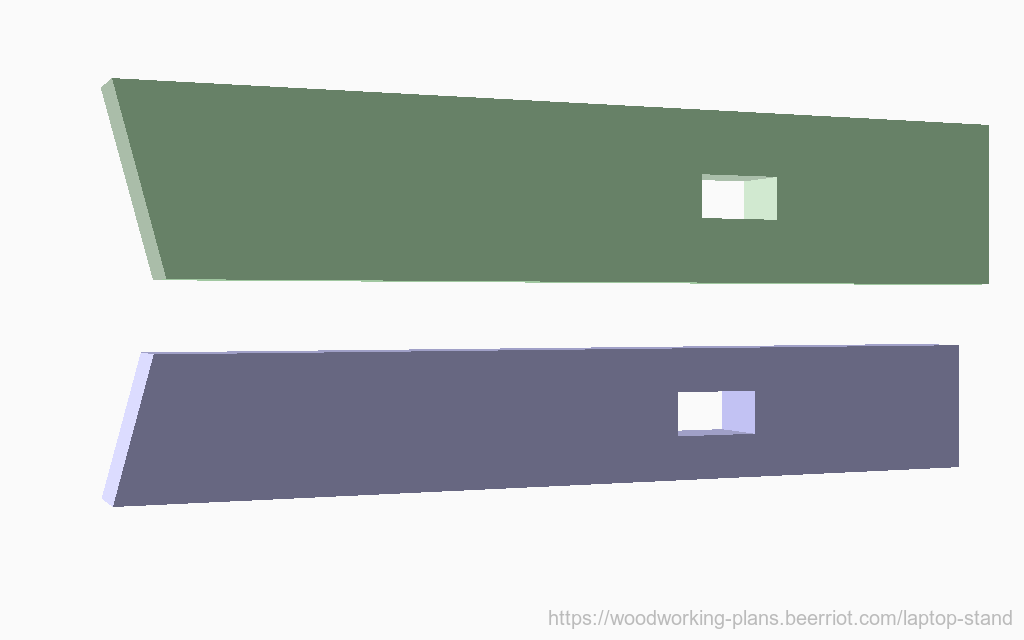
Follow the same procedure for the risers as you just followed for the feet. (Figure 3) The initial length for the risers is 27.02cm (again, longer than the parts diagram shows). The diagrams shown here place the riser stretcher about 1/3 of the way from the top end (or at least far enough to miss the arm, if you have modified the parameters: walls at 7.74cm and 10.27cm), and again in the middle of the width (walls at 1.87cm and 3.14cm).
Tilt
Cut the 15° tilt angle on the end of each foot and riser, at the end farthest from the mortise. (Figure 4)
Arms and cleats
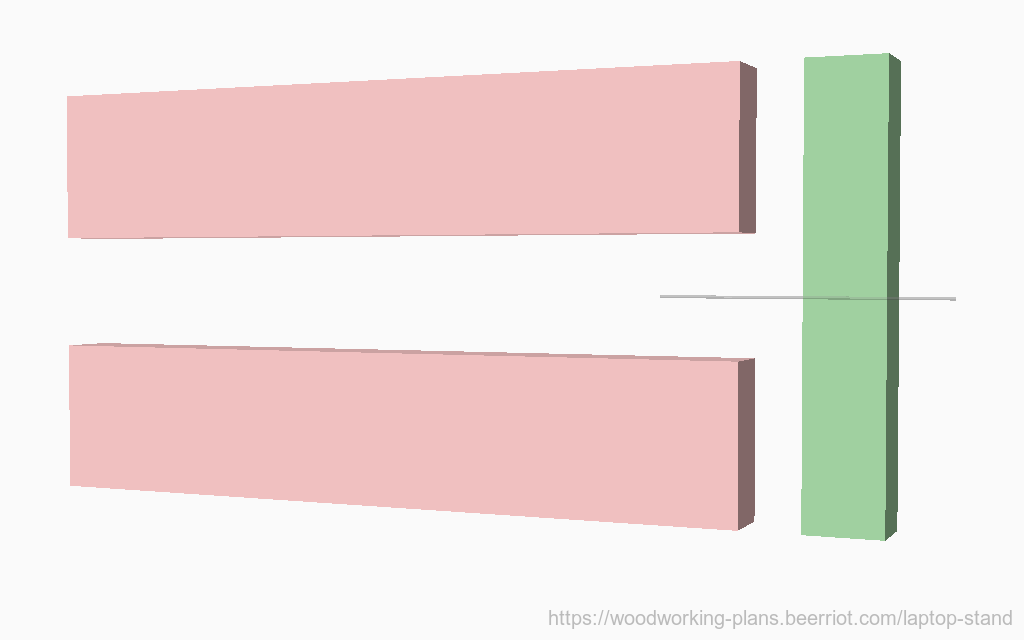
Cut the arms and cleat blank to length. Figure 5 demonstrates how the cleat blank should be long enough to make both cleats from.
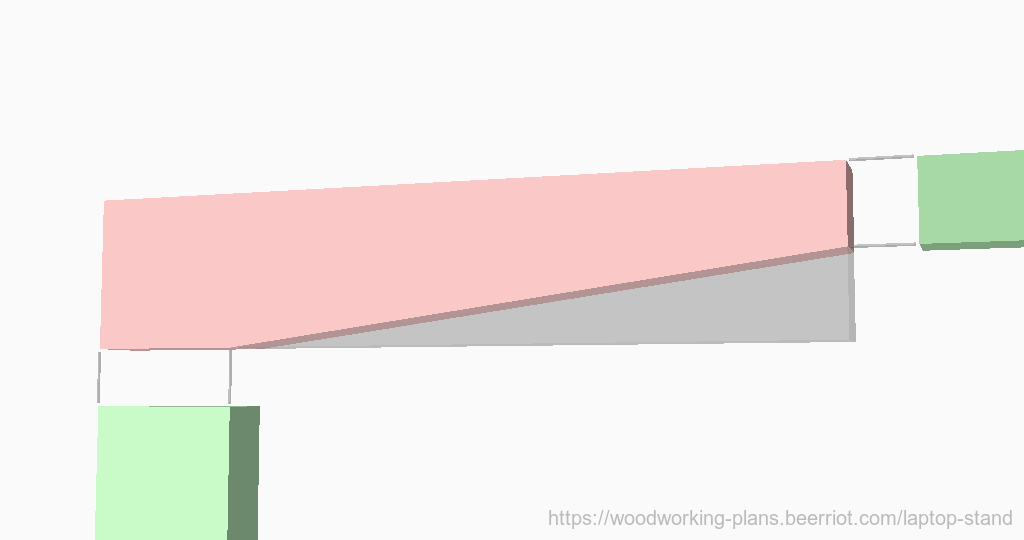
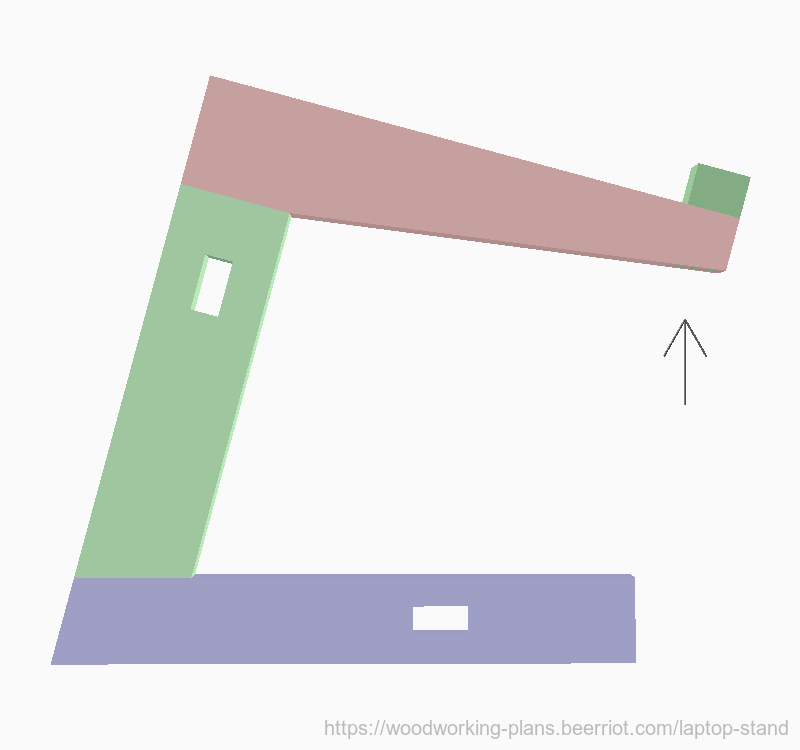
Optionally, cut a taper on the bottom edge of the arm. The exact angle and placement of this taper is mostly up to your taste. It helps open up the space between the feet and the arms, if you want to store other desk items in that area. The pictured design starts the taper at the inside edge of the riser, and ends it at the front edge of the arm, at a distance below the top edge equal to the width of the cleat. (Figure 6)
Grooves
Cut the grooves in both ends of the arms. The groove in the front end should match the width of the cleat blank at 2.42cm (or be just slightly deeper, to make it easy to trim them flush after assembly). The groove in the back end should match the width of the riser at 5cm. (Figure 7)
Tip: If you're using a table saw to make these cuts with a tenoning jig, run the piece through one way, then flip it around and run it through again the other way. This will ensure that the groove is perfectly centered, regardless of the width of the piece or of the groove.
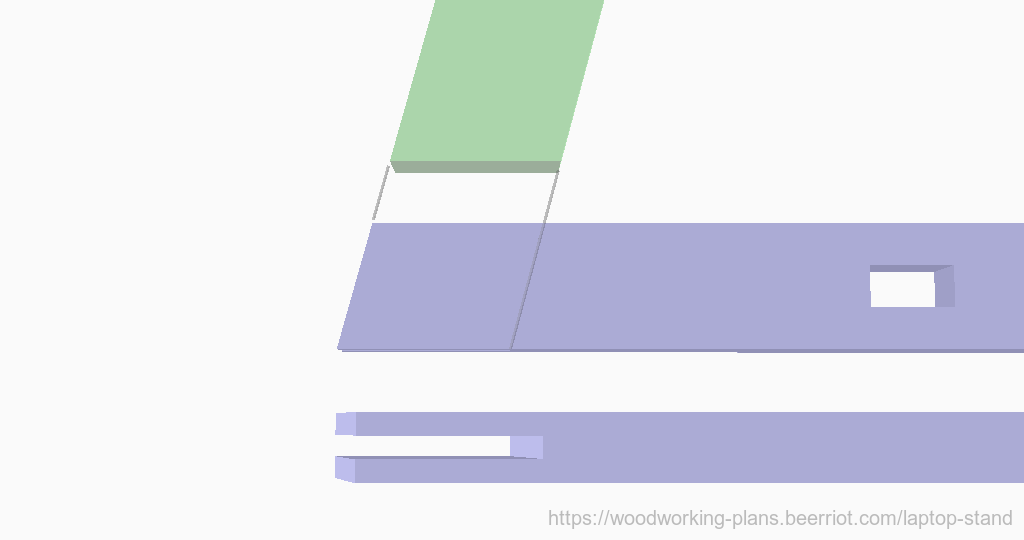
Also cut the grooves in the mitered end of the feet. The bottom of the groove should be parallel to the mitered end. The depth of the groove should match the width of the riser at 5 cm. (Figure 8)
Tongues
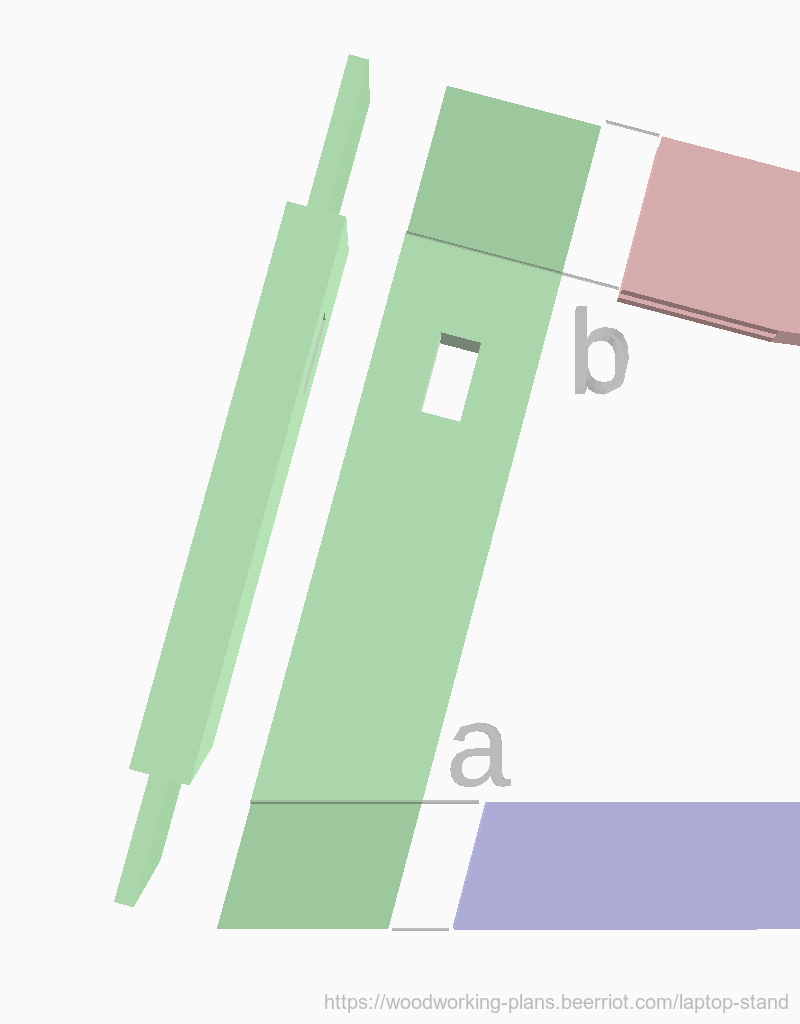
Cut the tongue on the mitered end of the riser to fit the groove in the foot. The shoulder of the tongue should be parallel to the miter, 3.8cm away. (Figure 9a) Cut the tongue on the square end of the riser to fit the deep groove in the arm. This shoulder is 5cm away from the end. (Figure 9b)
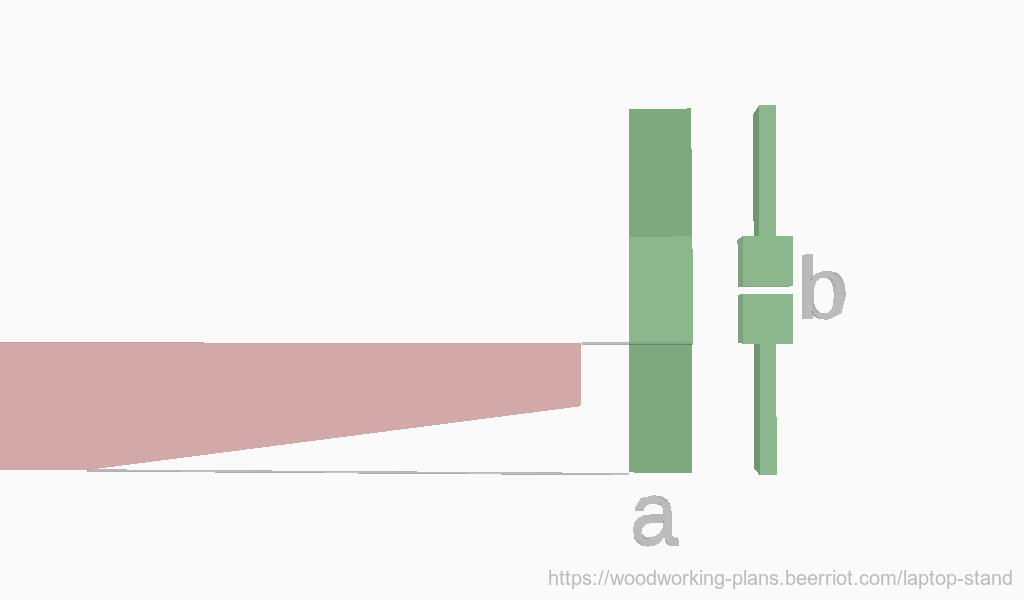
Cut tongues on either end of the cleat blank. Each cleat's tongue only needs to be long enough to pass through the front end of the arm, so if you cut the optional taper this won't be the full 5cm shown here. But, since they're easy to cut flush later, leaving the tongue longer is an easy way to make sure you don't end up short. (Figure 10a)
After cutting the tongues, separate the blank into two cleats by cutting 1.9cm toward the blank center from each tongue's shoulder. (Figure 10b)
Assembly
Before glueing everything together, dry assemble the parts to make sure the two side assemblies match exactly when the shoulders of each joint are fully seated. When they do, also install the stretchers and make sure the stand sits flat, and that the arms are parallel.
When you're happy with the fit, disassemble everything, and then reassemble after spreading glue in each groove and on each tongue and its shoulders. (Figure 11) Clamping across the joint, to pinch the groove onto the tongue, once the shoulders are fully seated, should be sufficient to keep the joint in place while the glue dries. Do not glue the stretchers into place yet.
When the glue has set on the side assemblies, trim any over extensions from the tongue-and-groove joints. (Figure 12)
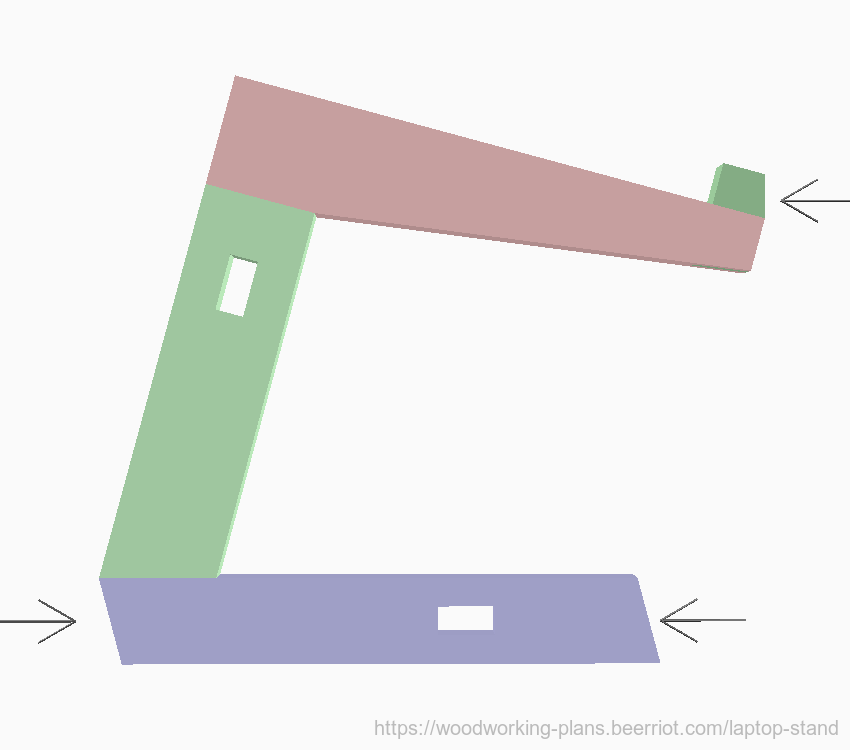
It's finally time to do the bit of trimming that makes the ends of the feet, risers, and cleats look exactly like they do in the parts key. Cut 15° angles on the front and back of the feet, and on the front edge of the cleats. (Figure 13) These are purely aesthetic, so don't fret too much about whether they are exactly the same on each side - just make them look similar.

Once the final modifications to the side assemblies are finished, apply glue to the mortises and tenons, and install the stretchers. After fully-seating both stretchers into both sides, it's a good ideal to clamp across the stand to hold the sides tight to the tenon shoulders. It's also a good idea to clamp the base of the unit down to a flat table. If there is any play in the joints, this will ensure that the glue cures in a way that keeps the unit flat.
Finished
When the stretcher glue has set, trim the ends of the tenons flush to the feet, and then apply the finish of your choice. Enjoy!
Notes
All components in the parts diagram are oriented such that wood grain would run left-to-right (horizontally).
If your mortises and tenons are precise, it may not be necessary to glue the stretchers into place. This will allow you to disassemble and flat-pack the stand for storage or transport later.
If you are glueing the stretchers into place, the stretcher between the feet may not be necessary. It adds some rigidity, but the riser stretcher may give you enough structure alone. You may still find it useful to cut a length of wood to use in place of the stretcher while assembling, to keep the feet (and arms) parallel while the glue sets.
One example of a build of this stand is documented here: https://blog.beerriot.com/2024/04/02/laptop-stand/.
Copyright © 2024 Bryan Fink
 This work is licensed under a Creative Commons Attribution 4.0 International License.