


Hanging wet laundry to dry uses less energy, and is gentler on clothing, than heated tumble drying. This rack provides ample space to hang several loads, while also folding near-flat for storage.
Step-by-step instructions for building this laundry rack follow. A video of this process is also available on YouTube.
Building Instructions
Cutting and Shaping the Components

These instructions assume that your square stock (for the legs and arms) and the dowels are already the correct width and thickness (Legs/arms: 3.8cm x 1.9cm, dowels 1.3cm in diameter). (Figure 0) The dimensions in these plans are the dimensions of commonly-available surfaced stock from major hardware stores. If you're starting with differently-sized wood, rip the square stock and turn the dowels to size before starting.
Step 1: Cut Legs to Shape

Cut four pieces of square stock to length for the legs (141.9cm). (Figure 1a)
Tip: Don't discard the offcuts from the legs and arms. They can be useful as spacers during assembly!
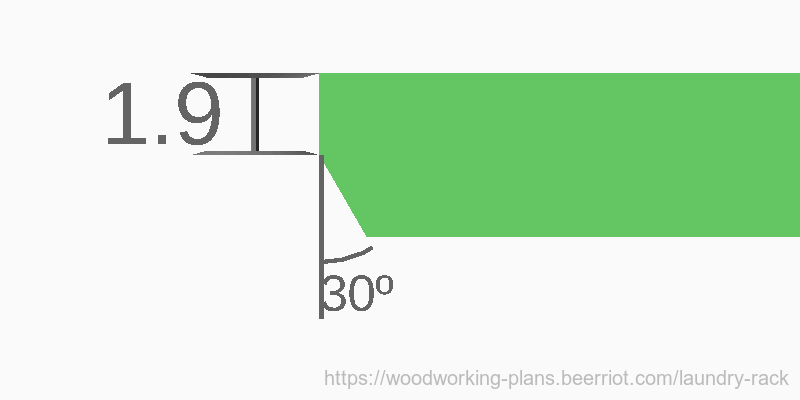
If you want the dowels in the arms to hang at exactly the height shown in the diagrams, also cut one corner, off thef bottom of each leg, at the complement of the angle that the leg rises when standing (30°). (Figure 1b)
Step 2: Drill holes in the legs
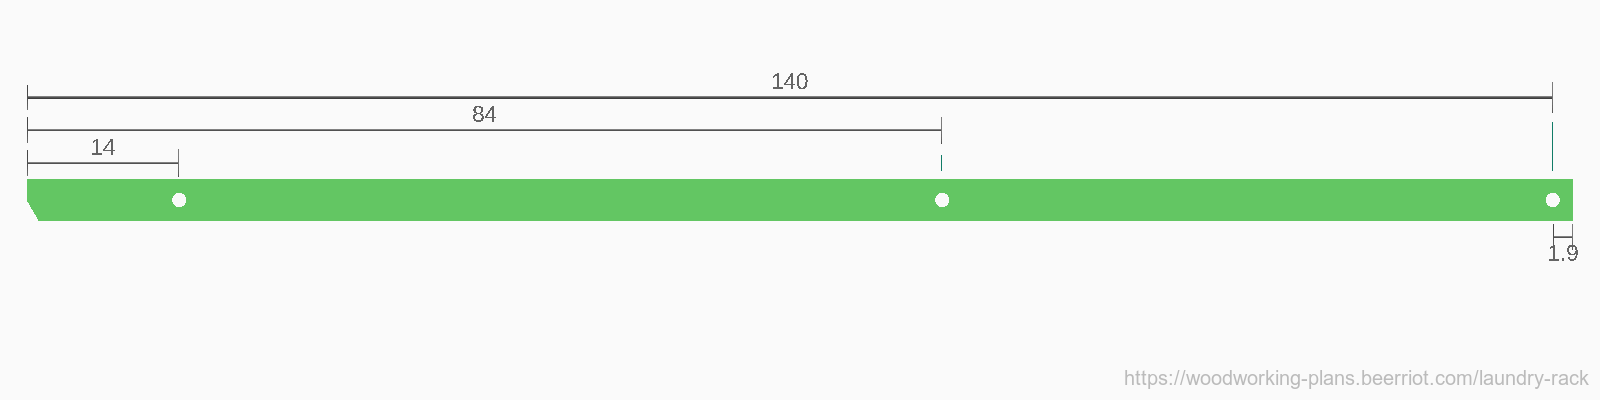
In each leg, drill three dowel-sized holes through the wide face. These should be centered on the width of the leg. Measured from the bottom, where you may have cut a corner off, they will be at 14cm, 84cm, and 140cm. (Figure 2)
Step 3: Cut Arms to length

Cut four pieces of square stock to length for the arms (87.8cm). (Figure 3)
Step 4: Drill holes in the arms.
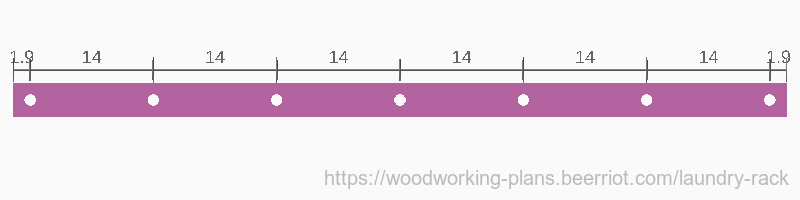
In each arm, drill 7 dowel-sized holes through the wide face. These should be centered on the width of the arm. Measured from one end, the center of the first hole will be at 1.9cm, and the center of each hole after that will be 14cm from the center of the previous hole. (Figure 4).
Step 5: Cut Dowels to length
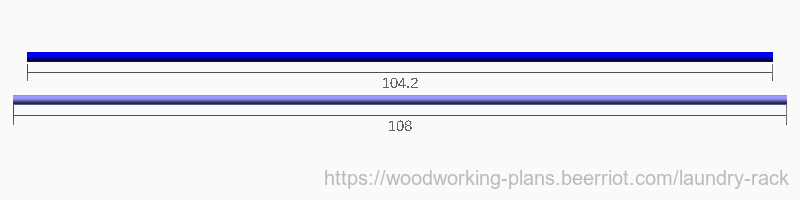
Cut the dowels to length. You will need 10 cut at 108cm, and 6 cut at 104.2. (Figure 5) Collect the small offcuts for use in the next step.
Step 6: Paint (optional).

Consider sanding and painting (or applying other finish) before assembly. It's easier to reach all the places, especially between where the legs meet, at this point.
Care still needs to be taken to prevent paint from getting where it shouldn't be. Tape the the ends of the dowels as shown in Figure 6. The last 1.9cm of all short dowels, and 6 long dowels should be left unpainted. This unpainted section will be glued in one of the holes in an arm or leg. Any paint on it might make the fit too tight, or interfere with the glue bond. On the remaining four long dowels leave twice that length (3.8cm) unpainted. The ends of those dowels will pass through two holes to form the pivot points.
To keep paint out of the holes in the arms and legs, push the off-cuts from trimming your dowels part way into them before painting. It should be easy to break any dried paint bond later by twisting the dowel stubs with a pair of pliers.
Assembly
Step 7: Assemble the narrow arms.
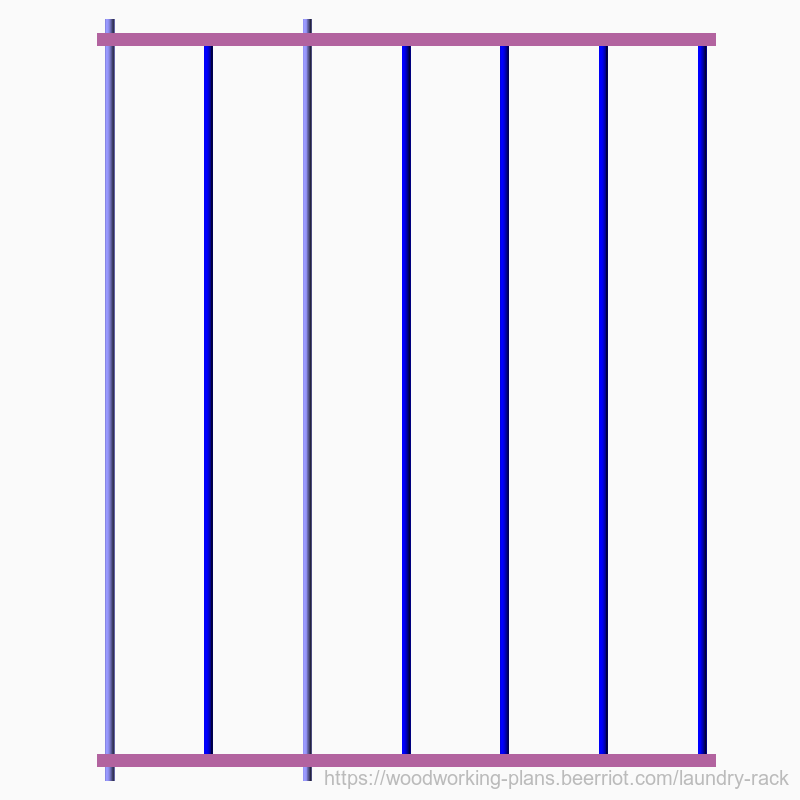
Apply glue to the first 4 holes in one arm, and to one end of 4 short dowels, then fit them into the holes. Push them in until the end of the dowel is flush with the outside of the arm.
Place a long dowel, one with the longer unpainted section if you painted in Step 6, into the next whole without glue. The arm should spin freely about this dowel after assembly, but don't worry if it's just a little tight at the moment. The leverage you'll have from pushing at on points in the rack will be able to overcome this friction. Push this long dowel through until it protrudes one leg thickness out of the other side of the arm. The paint will be touching the inside of the arm.
Tip: Pushing the long dowels through can be a good place to use off-cuts from the arms and legs. Lay them flat, put the arm on them without blocking the hole, and then push the dowel through until it touches the surface you're working on.
Apply glue and insert short dowels into the next 1 holes. Then insert one more long dowel, with the longer unpainted section, into the final hole, again without glue.
Apply glue to the same holes in a second arm, and push it onto the other ends of the dowels in the same orientation. Remember: only holes with short dowels in them should be glued at this step.
Set this assembly aside to dry. (Figure 7)
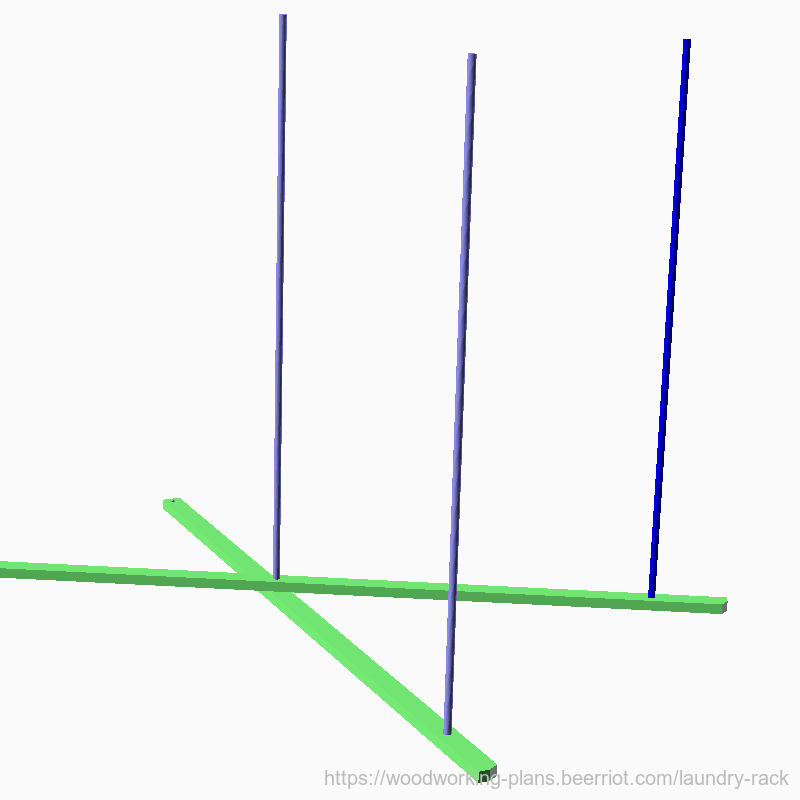
Step 8: Partially assemble the wide arms

Glue 5 long dowels into one of the two remaining arms, in the same positions you glued the short dowels in step 7. (Figure 8) If you painted the dowels in Step 6, these will all be long dowels with the short unpainted section. The ends of the dowels should be flush with the outside of the arm. Leave the two pivot holes empty for tnow, and do not attach the remaining arm to the other end of these dowels yet. Set this partial assembly aside to dry.
Step 9: Assemble one side of the legs
Glue a short dowel into the bottom hole of one leg (the hole that is 14 from the end). Glue a long dowel, one with the short unpainted section if you painted them in Step 6, into the bottom hole of a second leg.
Push a long dowel, one with the long unpainted section if you painted them in Step 6, through the middle hole of the leg with the short dowel attached, until it sticks out 1.9cm. Apply glue to the middle hole of the leg with the long dowel attached, and then push the protruding bit of middle dowel into this glued hole. If you cut the corner off the bottom of the legs in Step 1, be careful to orient this second leg correctly: the cutoff corners should face each other.
If there is any glue between the two legs, or on the dowel inside the outer leg, clean it up before it dries. The goal is to glue the middle dowel to only the leg that has the long dowel attached. The leg with the short dowel attached should pivot freely about the middle dowel.
Step 10: Attach the wide arms
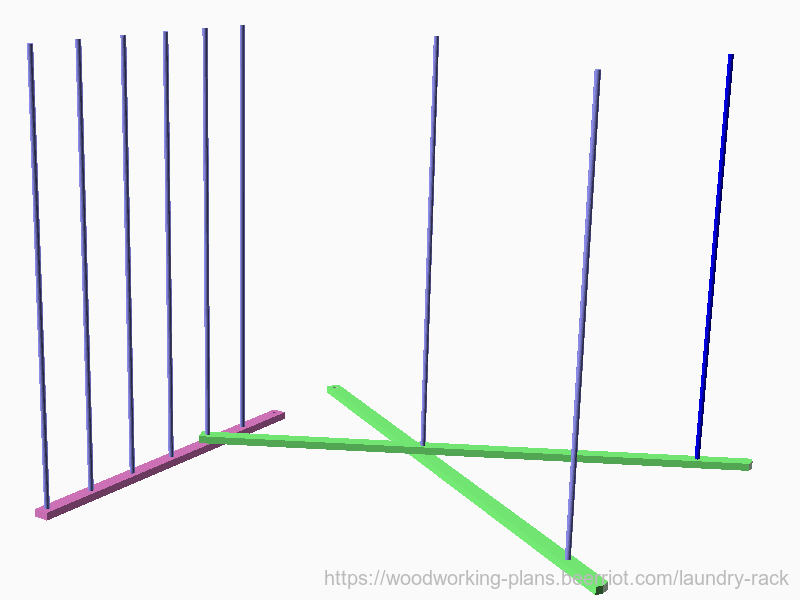
Tip: It's easiest to finish the assembly with the structure laying on its side. This is another good place to use off-cuts from the arms and legs. Lay them flat beneath the ends of the leg that is otherwise supported only in the middle, to keep the assembly from rocking.n
Push the remaining long dowel (it should be one with the wider unpainted section) through the top hole of the leg that had the short dowel attached to its bottom hole in Step 9. It should protrude from the opposite side 1.9cm.
Apply glue to the inner skipped hole in the unfinished wide arm assembly from Step 8. Push the end of the dowel protruding from the top of the leg into this hole. As before, clean up any errant glue so that the dowel is only glued to the arm, and the leg can still move freely.
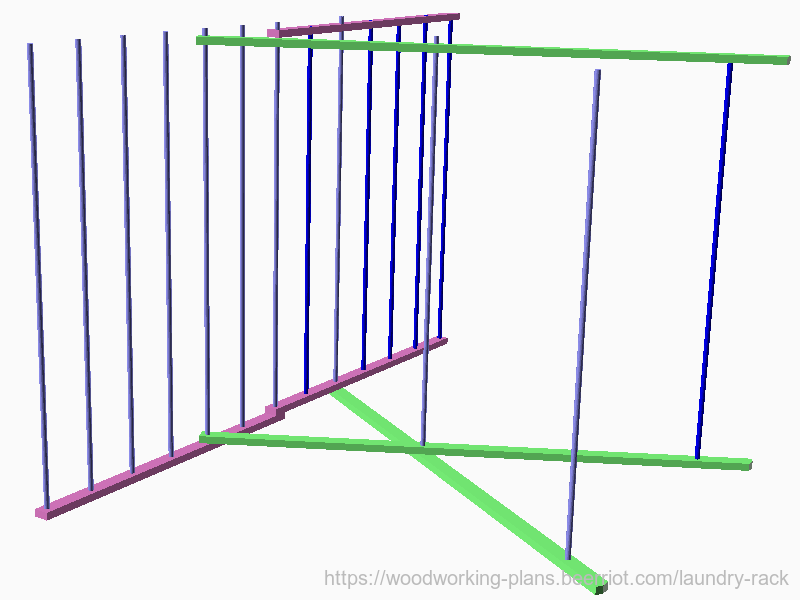
Step 11: Attach the narrow arms.

Apply glue to the open hole at the top of the leg, and then end of the wide arms. Push the end of the long dowels protruding from the narrow arm assembly into these holes. The dowel at the end of the assembly goes into the hole in the other arm assembly, and the dowel in the middle goes into the hole in the leg.
Step 12: Attach the inner leg.
Apply glue to the bottom hole of one of the remaining legs. Do not apply glue to the top or middle holes. Push this leg onto the three dowels protruding from the leg that is connected to the unfinished arm assembly (the one still waiting for its second arm). The dowel in the bottom hole should be flush with the outside of the leg, and the other dowels should stick through 1.9cm.
Be careful to match the cutoff at the bottom (if you made it in Step 1) to the cutoff on the leg at the other end of these dowels.
Step 13: Attach the final arm and leg.

The final arm and leg can be attached in either order. For each component, apply glue to each of its holes, and press onto the dowels protruding from its matching component. All dowels should sit flush with the outer edge.
When attaching the leg, be careful to orient the cutoff at the bottom (if you made it in Step 1) in the correct direction. It should match the piece at the other end of its dowels.
Stand the rack up, and try opening and closing it. If your dowels fit their holes tightly, the movement may be stiff at first. Over time it should loosen up. If your rack doesn't sit without rocking, or doesn't fold evenly (i.e. one side sticks out farther than the other), it may be that some of the holes are not aligned. In that case, check all distances between dowels and ends of arms and legs. If one or more is off, cut the dowel off, drill a new hole in the correct position, and insert a new dowel.
Step 14: Add a locking hook.
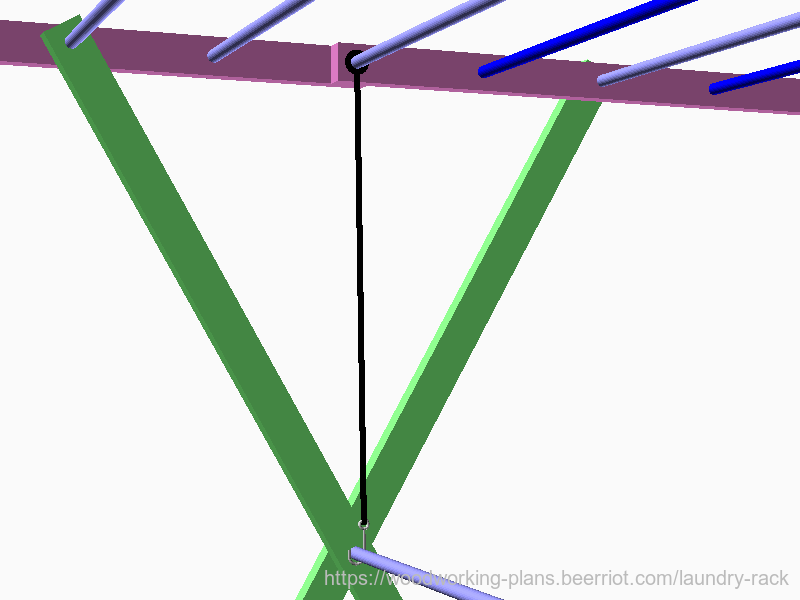
To keep the rack from folding up when weight - like wet laundry - is applied to the arms, a simple lock can be made from some paracord (or other strong string, twine, etc.) and a hook large enough to hang on one of the dowels. Tie the hook to 48.5cm, plus enough extra length for a knotted loop on either end, of paracord.
Open the rack so that the arms are parallel to the ground, or so that the ends of the arms are just slightly higher. Place the hook around the dowel in the middle of the legs, and then run the line up over the dowel connecting the arm assemblies. Tie the line around this dowel so that the line is taught.
Repeat this process for a second hook-and-line lock. Push one lock to one side, and the other lock to the other side. This will balance out the pressure across the rack, and decrease the potential for a dowel to snap.
Try pushing on the ends of the arms. If your knots hold, the rack shouldn't collapse. To fold up the rack, raise the ends of the arms far enough above parallel to allow the hooks to swing free of the center leg dowel. Move the hooks out of the way - I like to hook them one one of the arm dowels - and press down on the arms to fold up the rack.
Congratulations! Your laundry rack is now complete. Fold it up and slide it away somewhere until laundry day. Then unfold it, and hang your wet laundry to dry.
Copyright © 2021 Bryan Fink
 This work is licensed under a Creative Commons Attribution 4.0 International License.